Once the correct version of your bot is published to production, you are ready to integrate Chat onto your site! Under the Deployment section of your bot, you will see the option for the Integrations screen. Here you will see three options to integrate Chat:
- Embed Code
- Build on the Yext Chat SDKs
- Connect to APIs
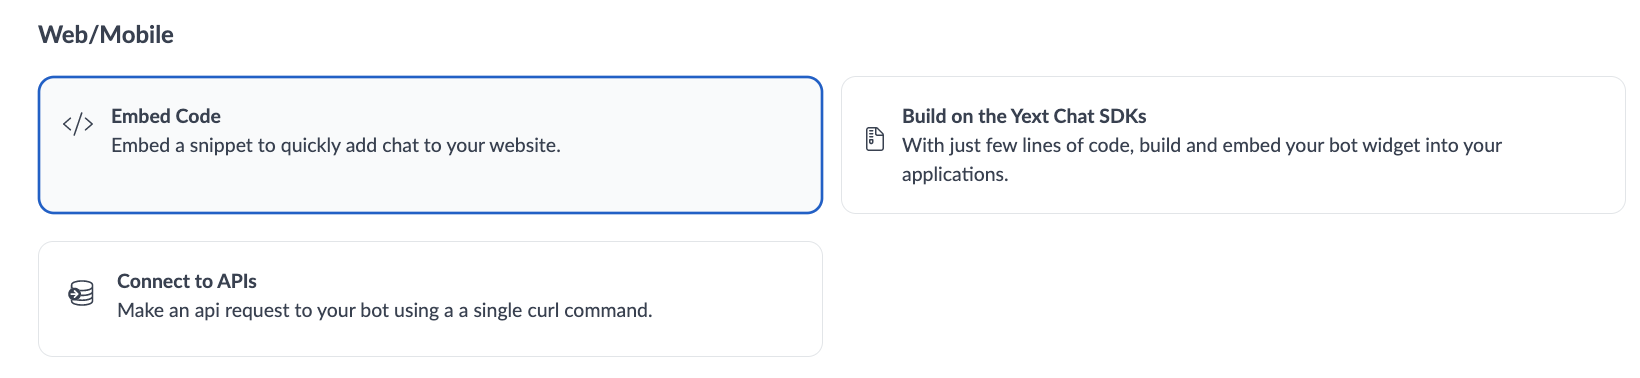
For each option, you can select the tile on the Integrations screen and follow the directions listed in the modal.
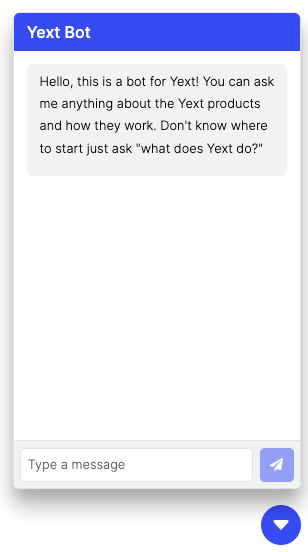
Once you add a bot to your site, you’ll see the default chat icon on your site that users can click on to interact with your bot. The default styling is blue and will look like this:
Context
As part of integrating Chat onto your site, you can further provide your bot with information about your site and users. This is referred to as context. Based on the context setup in the frontend code of a bot, it can behave and respond differently to meet the needs of your user. Some examples of context you may want to pass to a bot are:
- The locale of the user’s website
- Information about the page that bot is located on (e.g., a product page vs a location page)
- The login status of the user
Context can then be referenced in the Chat configuration using embedded fields.
Usually, you’ll want to set context dynamically within your front-end code by accessing some other value, such as the location of the page, or the user’s ID. Here’s how to do this.
Context via Script Tag
If you’re using the script tag integration, you can set context using the setContext method.
<link rel="stylesheet" href="https://assets.sitescdn.net/chat/v0/chat.css" />
<script defer src="https://assets.sitescdn.net/chat/v0/chat.umd.js" onload="initChat()"></script>
<script>
  function initChat() {
    // First, initialize the chat widget as you would normally
    window.ChatApp.mount({
      apiKey: "<YOUR_API_KEY>",
      botId: "my-chat-bot",
      title: "My Chat Bot",
      stream: false,
    });
	  // Next, get whatever information you need to pass to the bot
		// (You write this code)
		const { userId, locationId } = getContextData();
		// Finally, set the context in the chat apps
    window.ChatApp.setContext({
			userId: userId,
			locationId: locationId
    });
  }
</script>
Context via Headless SDK
If you’re using the headless SDK, you can use the setContext hook. Here’s an example in React:
import { useEffect } from "react";
import { useChatActions } from "@yext/chat-headless-react";
import { ChatPanel } from "@yext/chat-ui-react";

function MyApp() {
  const chat = useChatActions();

  // Write your code to get the data
  const { userId, locationId } = getContextData();

  // Set the context once when your application loads
  useEffect(() => {
    chat.setContext({
      userId: "1234",
      businessId: "3472542",
    });
  }, []);

  return <ChatPanel />;
}
Using Context in Instructions
Once you’ve set context on the front-end, you can reference that context within the instructions of your bot. When you are setting up an instruction you can use the bracket notation [[context.INSERT_CONTEXT_ID]] to pull the information you set up in the previous step.
Here are a couple examples of ways you might use the context and how you would reference them in your bot configuration:
- Using a User ID (e.g.,
[[context.userID]]), fetch data about that user’s order history to answer questions such as “when will my order arrive” - Limit Yext Search results to a specific category (e.g.,
[[context.category]]) or even to a specific product (e.g.,[[context.product]])
Location-Specific Chat Bot Example
Often, you’ll want Yext Chat to answer questions about a single physical location. For example, if you are using Yext Chat on your restaurant chain’s landing pages, you might want it to answer questions only about the location whose page it’s located on.
You can accomplish this by passing the location’s ID in the Knowledge Graph, using the Yext Content API to fetch data about it, and then using that data to answer the user’s question.
1. Add Context to the Chat Front-End
First, set the location ID on the front-end. Depending on how your pages are set up, this may be stored somewhere in the DOM or on the window.
<link rel="stylesheet" href="https://assets.sitescdn.net/chat/v0/chat.css" />
<script defer src="https://assets.sitescdn.net/chat/v0/chat.umd.js" onload="initChat()"></script>
<script>
  function initChat() {
    window.ChatApp.mount({
      apiKey: "<YOUR_API_KEY>",
      botId: "my-chat-bot",
      title: "My Chat Bot",
      stream: false,
    });
	  // Get the location ID
		const locationId = getLocationId();
		// Finally, set the context in the chat apps
    window.ChatApp.setContext({
			locationId: locationId,
    });
  }
</script>
2. Reference context in the bot configuration
Next, you can reference this data inside the instructions of your bot by using bracket notation [[context.locationId]] and use it to look up information about that entity within Yext Chat.
Here’s a simple example of how your bot configuration might look. This configuration has a single goal called answer-location-question which uses the Yext Content API to fetch information about that location and answer the user’s question about it. In the code you will see that the location ID is inserted in the URL of the API call:
{
  "$id": "yext-marketing-bot",
  "$schema": "https://schema.yext.com/config/chat/chat-bot/v1",
  "name": "Location Bot",
  "initialMessage": "Hi! This is the bot for Bob's Burgers. How can I help you?",
  "goals": {
    "answer-location-question": {
      "goal": "Answer a question about Yext.",
      "instructions": [
        {
          "restApi": {
            "method": "GET",
            "url": "https://cdn.yextapis.com/v2/accounts/me/content/my-content-endpoint/[[context.locationId]]?apiKey=<YOUR_API_KEY_HERE>"
          }
        },
        {
          "reply": {
            "instruction": "Based on the data you found, answer the user's question.",
            "mode": "DIRECT_ANSWER"
          }
        }
      ]
    }
  }
}
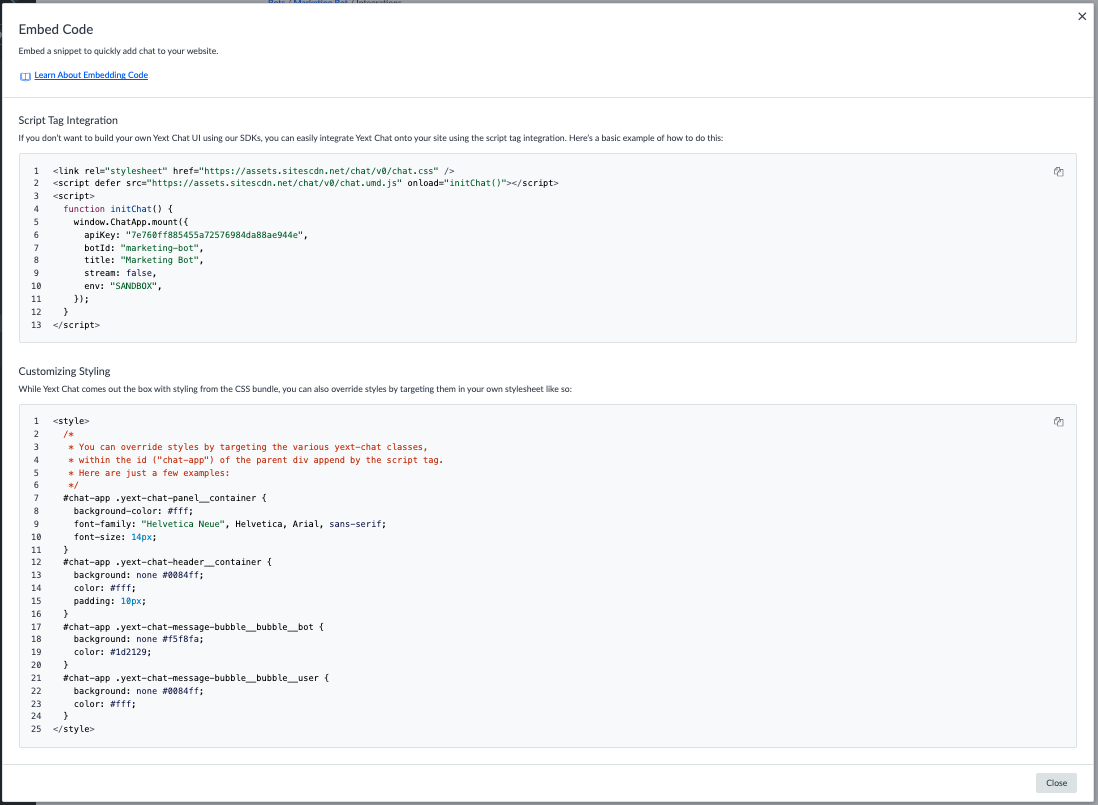
Embed Code (Script Tag)
You can easily integrate Yext Chat onto your site using the script tag integration.
To integrate via script tag, start by importing the code from the Script Integration Tag section into the head of your HTML document. (This can be also done via Google Tag Manager.)
Additional Behavior Configuration
The script tag allows for a stream property to be added to the code. This controls the streaming animation for your bot. If this is set to false the bot will just display the message to a user as a full block of text once it is ready. If this is set to true it will display the build of the message so the words appear as they are being generated by the bot. Below you can see an example of a bot with streaming animation enabled.
You can also add multiple hard coded message suggestions to help guide users on how to interact with your bot. The code should be formatted like this:
messageSuggestions: ["How do I add an entity?","What is Yext Chat?", "API Docs"] 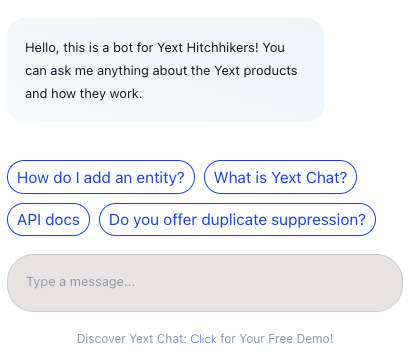
To learn more about the additional properties that can be modified, see the ScripTag Integration Properties documentation.
Custom Styling
Chat comes with some default styling, but you can also override the styling by targeting them in your own style sheet. The modal will also give you some code to work with to do this:
<style>
  /* You can override styles by targeting the various yext-chat classes */
  /* Here are just a few examples: */
  .yext-chat-panel__container {
    background-color: #fff;
    font-family: "Helvetica Neue", Helvetica, Arial, sans-serif;
    font-size: 14px;
  }
  .yext-chat-header__container {
    background-color: #0084ff;
    color: #fff;
    padding: 10px;
  }
  .yext-chat-message-bubble__message__bot {
    background-color: #f5f8fa;
    color: #1d2129;
  }
  .yext-chat-message-bubble__message__user {
    background-color: #0084ff;
    color: #fff;
  }
</style>
If you don’t need to make any adjustments, you don’t need to add this CSS to your site.
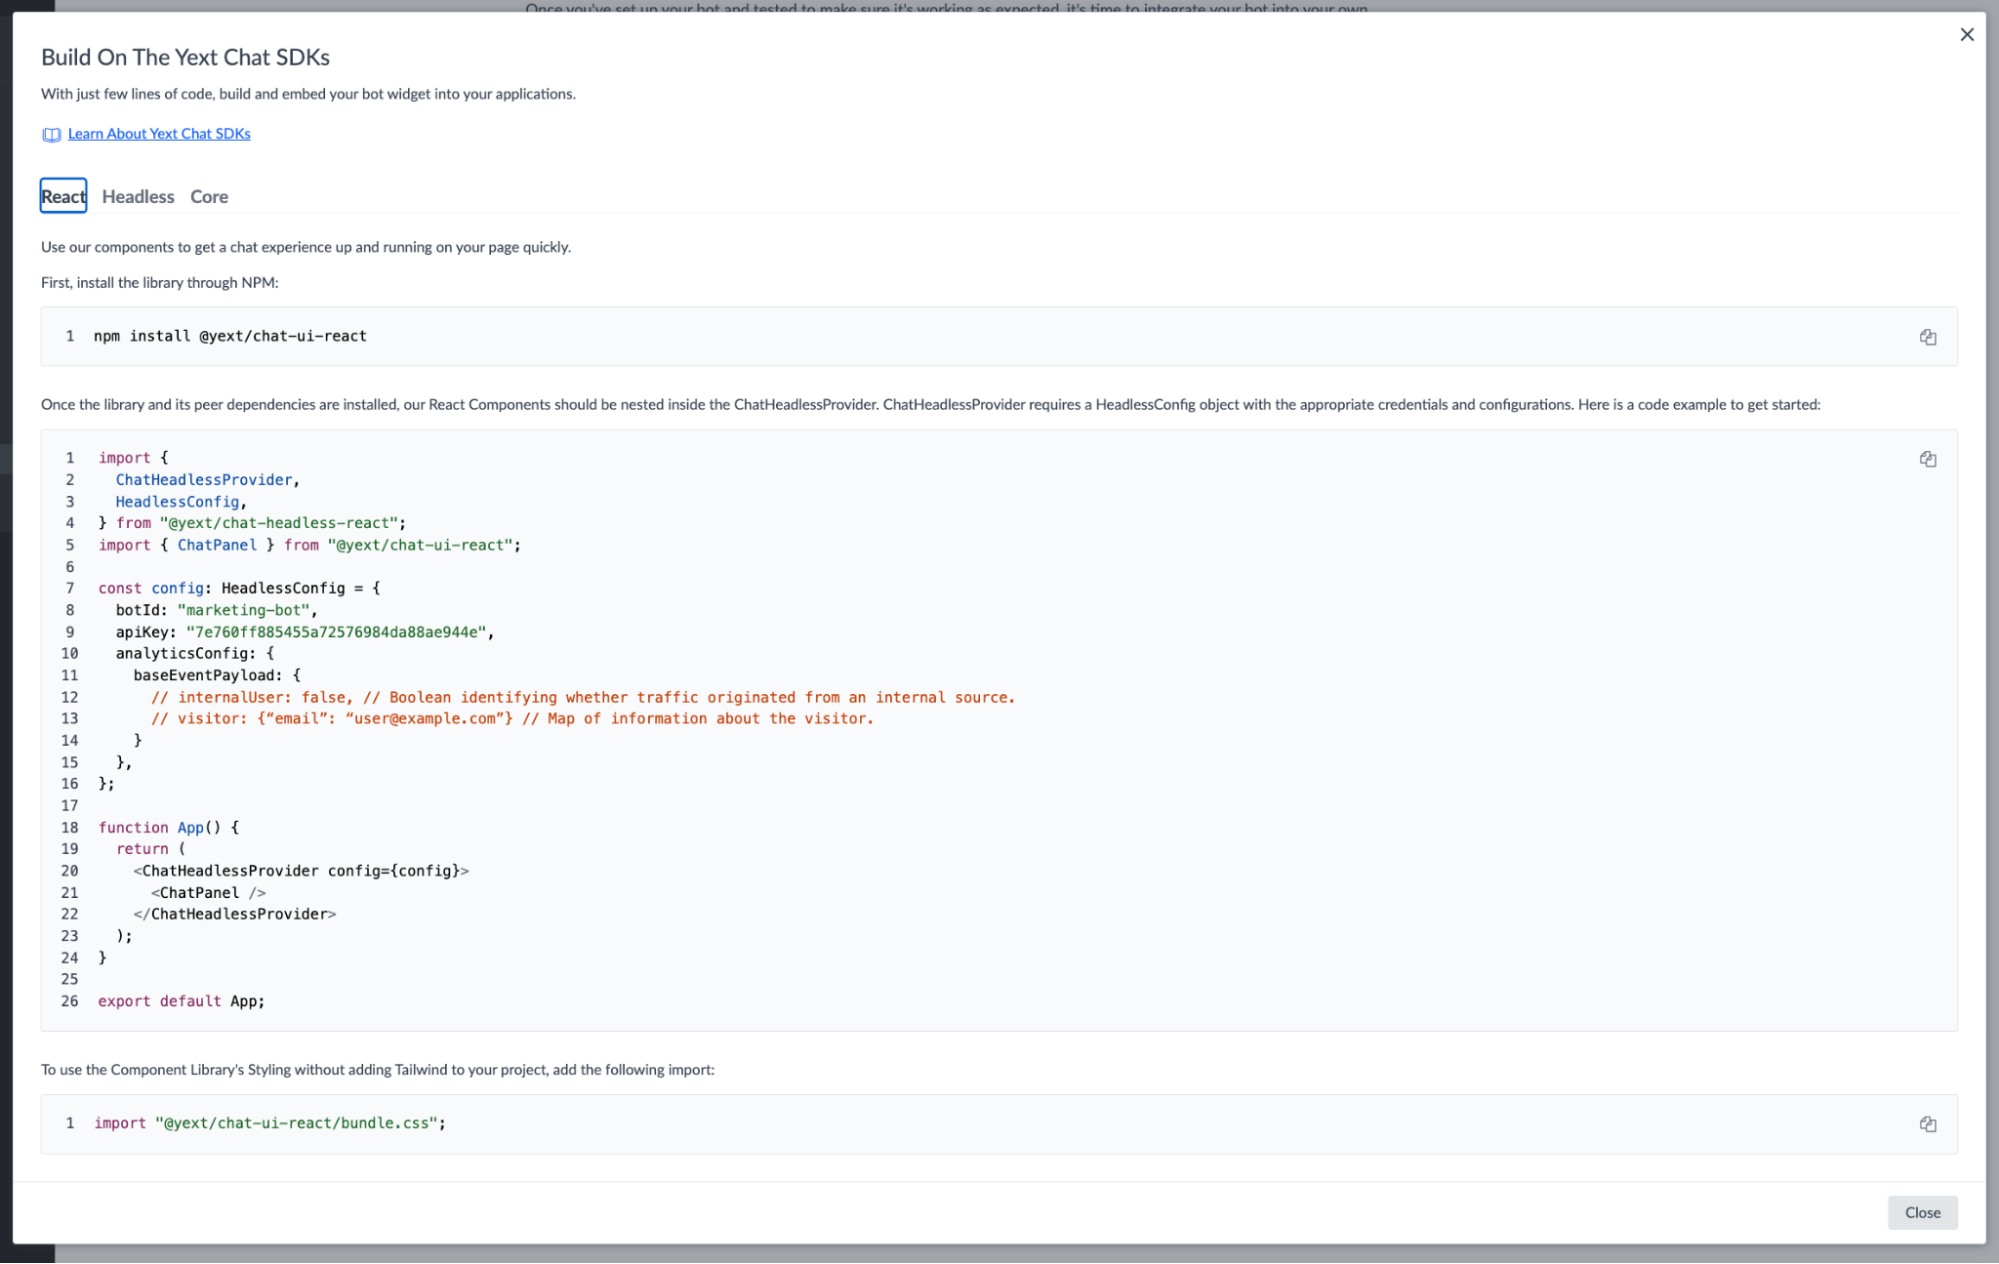
Build on the Yext Chat SDKs
When you click on the Build on the Yext Chat SDKs tile on the Integrations screen, you will have three options to build with:
- Chat UI React
- Chat Headless
- Chat Core
You can click the tabs in the modal to navigate to each method. For each, the modal will show you directions on how to install the library as well as sample code you need to get started.
For details on these options, visit our Chat SDKs documentation.
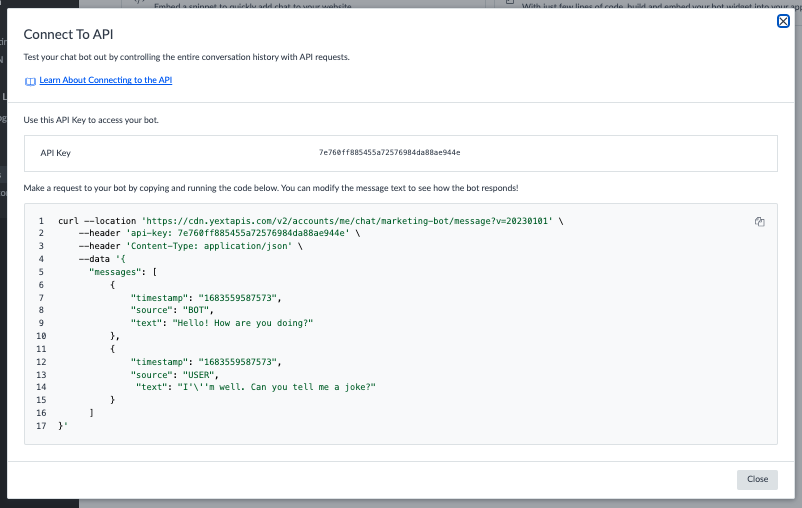
Connect to APIs
For the Connect to APIs option, the modal will give you your API key and the code needed for setup.