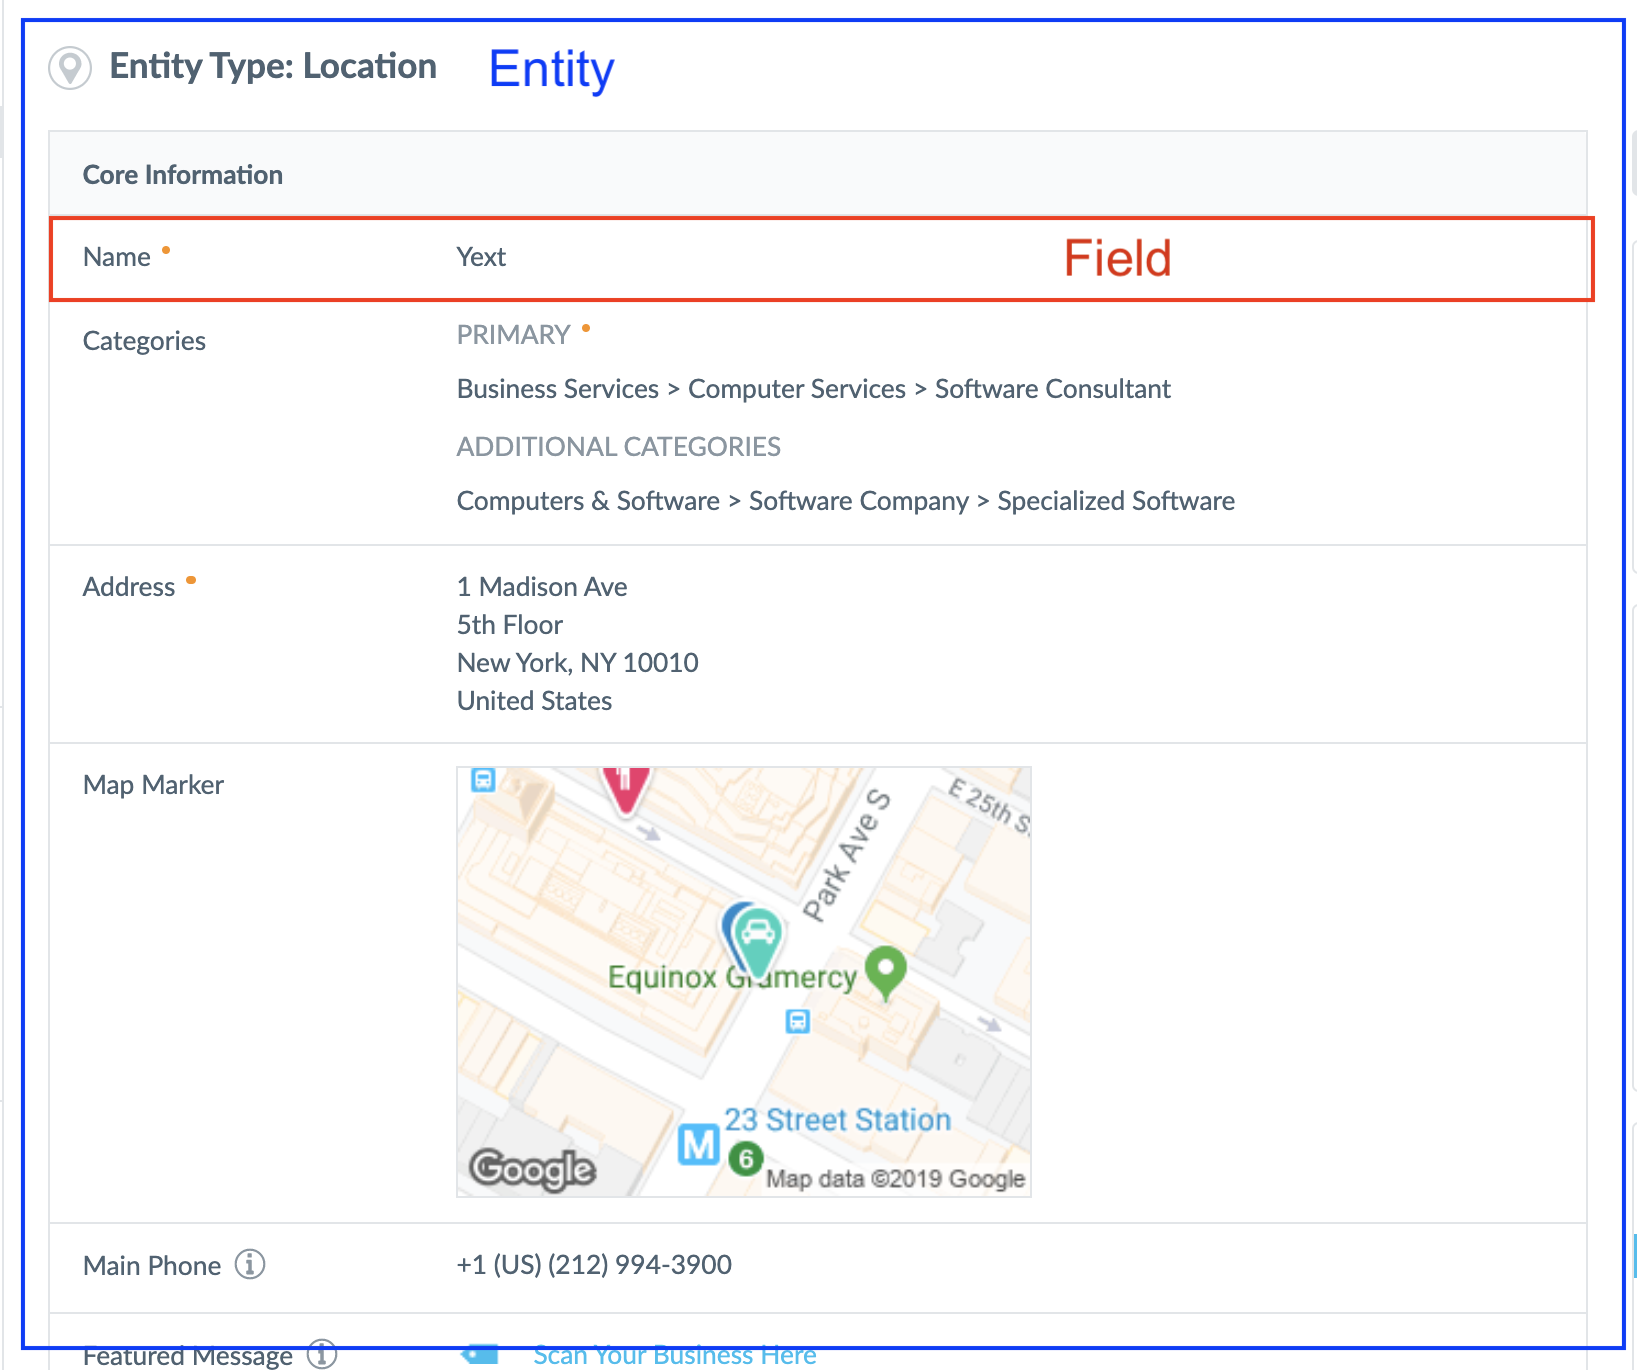
A field represents a piece of data that is stored on an individual entity. A single field can be used across different entity types.
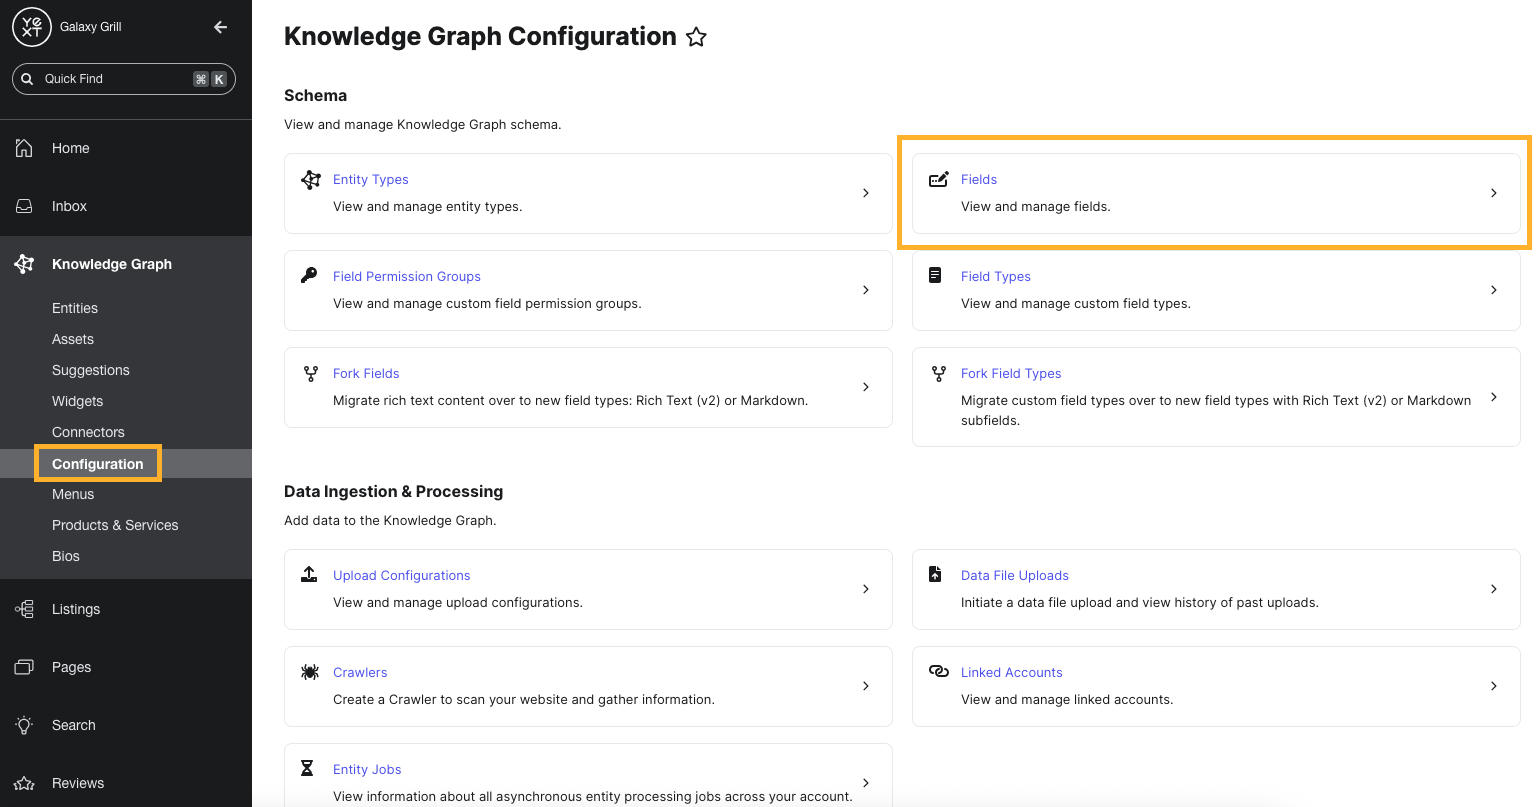
To view and manage the fields in your account, navigate to Knowledge Graph > Configuration and click the Fields tile.
Yext has a number of built-in fields, and you can create additional custom fields as needed. All fields on entities, whether built-in or custom, have these properties:
- A type (the format of data the field accepts — more on field types below)
- A Display Name
- An API name
- Validation (e.g., a maximum character count for text fields, or an aspect ratio for photos)
- Multi-language behavior (how the field behaves when translated, if you are using multi-language experiences )
Create a custom field
You can create custom fields to store additional information about entities in the Knowledge Graph.
-
Navigate to Knowledge Graph > Configuration and click the Fields tile.
- Click Create Custom Field.
-
Click the Select Field Type dropdown and select the type of custom field you would like to create.
- To learn about creating field types, see Manage Field Types
- Fill out the details for your field settings. Below, we will walk through the settings available.
- After your settings are added, click Save Field in the lower right.
Basic Field Settings
Enter the basic information for your field. Depending on your chosen field type, you may see slightly different options.
-
Field Name
- Note: You cannot change the field type after the field is created.
-
ID: this will be automatically set based on the name, but you can modify it if desired.
- It is not recommended to change this once the field is created, because it could break applications that reference the current field ID.
- Entity Type Availability: select the entity type or types you want this field to be available for.
- Field Settings: set the options for field validation and accepted input. Depending on your chosen field type, you may see different options.
-
Tooltip Description: (optional) display a description that will appear in the Knowledge Graph when users click on the question mark icon next to the field name.
Advanced Field Settings
Configure additional settings for your field if you choose. Depending on your chosen field type, you may see slightly different options.
- Custom Field Permission Group: Assign a field permission group to limit users that can access this field. For more on creating custom permission groups, see Create a Custom Field Permission Group.
- Alternate Language Behavior: If you are using alternate language profiles on entities, choose how you want this field to behave across entity profiles. For more on alternate language behavior, see the Manage Multi-Language Sites on Hitchhikers.
-
Write Scope: the systems that are allowed to make changes to the field. Choose one or more of the following options:
- Yext System (this will always be selected)
- App
- User
- Connector
Translations
If you're using alternate language profiles, add translations to field settings:
- Click Add translation on any setting where the option is displayed, such as the name and tooltip.
- Choose your desired language and enter the translated value. Click Save or Save & Add Another to add another translation to the same setting.
Computed Field Values
You can define computation methods for fields if you want them to be automatically set by the Yext system.
Click the Computation Method tab to access the field computation settings.
Update Settings on a Field
You can update the settings for existing fields. Note that it may not be possible to change certain field settings if:
- The field is already in use on entities
- The field is a built-in Yext field, not a custom field
To update field settings:
- Navigate to Knowledge Graph > Configuration and select the Fields tile.
- Find and click on your desired field in the table.
- Change any desired settings in the Settings tab. When finished, click Save Field in the lower right.
View Field API Names
The API name is the unique ID for a field in the Yext system backend. API names are used to identify fields for applications such as integrating Yext with other systems.
You can view fields and their API names in a few ways.
Via an Entity Types Field Configuration
- Click Knowledge Graph in the navigation bar and click Configuration.
- Click Entity Types.
- Click View Details next to the desired entity type.
- Click on the Fields tab.
- You’ll see all fields configured for this entity type, organized by field section. The API name for a field is listed directly under the field name.
Via Entity Edit
- Click Knowledge Graph in the navigation bar and click Entities.
- Select your desired entity.
- You will see the list of fields for that entity with the API name below the Field Name.
Via Field Settings
- Click Knowledge Graph in the navigation bar and click Configuration.
- Click Configuration.
- You will see a list of all fields in your account with the API name below the Field Name.
Fields Limitations
| Object | Limit |
|---|---|
| File size | 1 GB |
| Image size | 100 megapixels. Applies to Photo fields only. Larger images may be uploaded to File fields. |
| List field items | 5,000 items |
| Multi-Option Select field items | 2,000 items |