The Kyruus Connector pulls healthcare provider and facility information from Kyruus into the Yext Knowledge Graph. Once in Yext, this data can be used to power Listings, reviews, and Find a Doctor search experiences.
Prerequisites:
- A Kyruus instance with the Search v9 API enabled.
- A Kyruus Client ID and Client Secret.
This guide covers five steps:
- Link your Kyruus account to Yext
- Install the Kyruus App
- Configure the Kyruus Connector
- Choose your connector schedule and run settings
- Additional considerations
Link your Kyruus account to Yext
Provide your Kyruus credentials in Yext to authenticate API requests that will fetch your providers and/or locations from the Kyruus Search API.
- Navigate to Knowledge Graph > Configuration > Linked Accounts.
- You'll see a predefined Kyruus provider. Click Add Linked Account on the right side of the screen.
-
In the modal, enter your Kyruus account details:
- Client ID and Client Secret from your Kyruus instance.
- A name and ID for reference in Yext (you can name these anything).
Click Save.
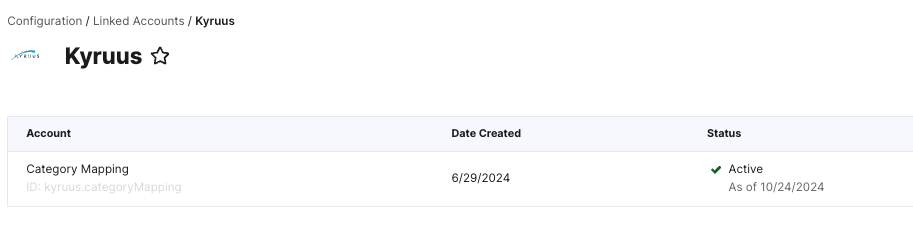
- You will see confirmation that the linked account has saved. Click on the linked account to see its details — the status should be Active. Copy the ID from the Details screen, as you'll need it in the next step.
Install the Kyruus App
With your Kyruus account linked, install the Kyruus Provider and/or Location apps from the Yext App Directory. These apps install pre-configured data connectors and the necessary transforms to convert Kyruus data into Yext entity types.
- In Yext, navigate to Apps > Integrations.
- Search for "Kyruus." You will see two apps: Kyruus Location Connector and Kyruus Provider Connector.
- To pull in healthcare professionals, use the Kyruus Provider Connector.
- To pull in healthcare facilities, use the Kyruus Location Connector.
- You can install and use both apps. Start with one and repeat these steps for the other.
- Select an app and follow the on-screen steps. When you reach the input fields, enter the Linked Account ID from Step 1 and your Customer Name (the customer name associated with your Kyruus instance).
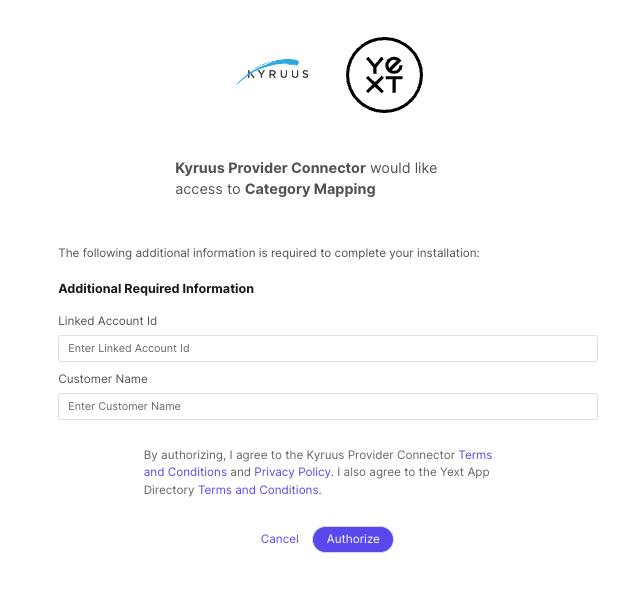
- Click Authorize. Once installed, the app will appear under Apps > Your Integrations.
Configure the Kyruus Connector
After installing the app, the associated Kyruus connectors are automatically installed. A connector takes data from a source and transforms it into entities in the Knowledge Graph.
- Navigate to Knowledge Graph > Connectors.
- Select View on the Provider or Location connector created by the app. If you installed both apps, start with one connector and repeat these steps for the other.
- Click Edit Configuration in the top right.
- All necessary configuration options are already set up by the app. The pre-configured items include:
- Source: Kyruus
- Settings: Account details from the linked account
- Specify Selectors: Which data elements from the Kyruus Search API are used
- Transforms: Logic for converting Kyruus API data into a format usable by Yext
- Destination: The Knowledge Graph — specifically, the Healthcare Facility and/or Healthcare Professional entity types
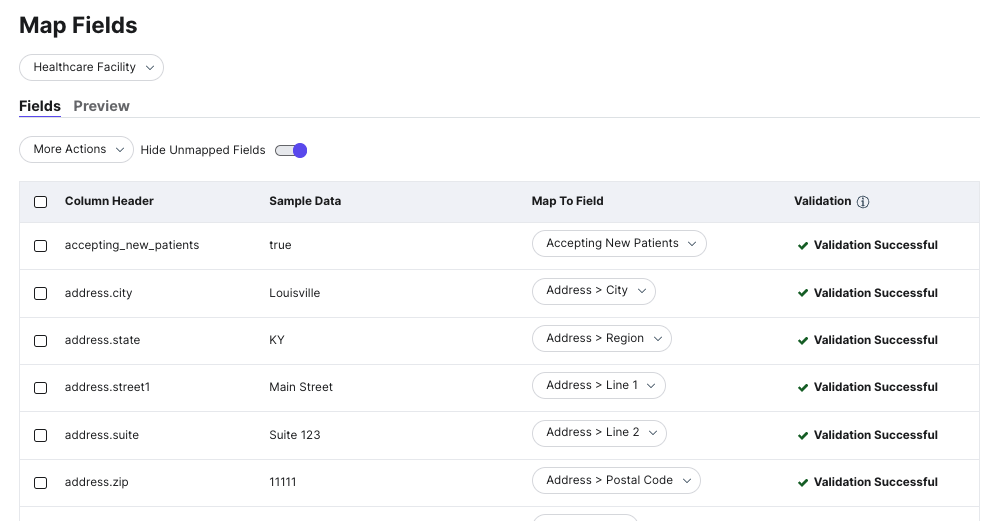
- In the Map Data section under Destination, review the field mappings to ensure Kyruus fields are mapping to the appropriate Yext fields. These should be automatically set based on the standard Kyruus-to-Yext field alignments.
- Click Save. Hold off on running the connector until you've reviewed the next step. If you do run it now, select Save and Run Connector and choose Dry Run to preview what changes will be made before updating your entities.

Choose your connector schedule and run settings
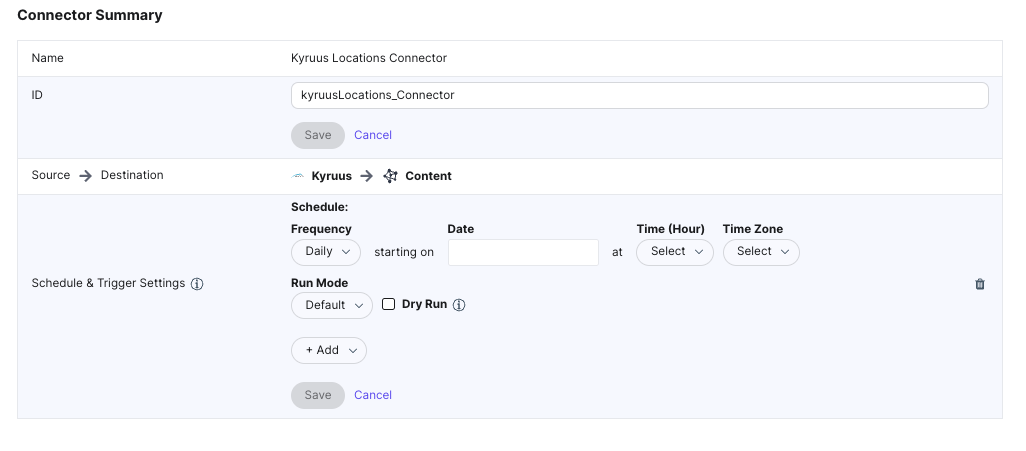
Once the connector is saved, determine how and when it runs. The available configuration options are:
- Schedule or Trigger: Schedule the connector to run automatically at a set interval (Hourly, Daily, Weekly, Monthly, or Custom), or trigger it when another connector finishes running.
-
Run Mode:
- Default mode creates and updates entities only.
- Comprehensive mode can also delete entities not included in a given run. See Step 5 for more on comprehensive mode settings.
- Dry Run: When enabled, the connector always produces a dry run report after each run. The report must be approved before any entities in the Knowledge Graph are actually updated.
For more information, see the Connectors reference documentation on Dry Runs, Run Modes, and Connector Triggers.
Additional considerations
Ingesting only employed providers
Depending on how you plan to use your Provider and/or Location entities in Yext, you may not need all providers or locations stored in Kyruus. Many healthcare systems only need their employed providers.
To filter which providers are included, add a Filter Rows transform in the Specify Selectors step of your connector configuration. Select Add Transform, choose the column that contains the relevant details (for example, whether a provider is accepting new patients), and configure the filter accordingly.
Using entity templates for newly created providers or locations
If your newly created entities need content that isn't in Kyruus — such as a uniform description, business logo, or standard FAQs — entity templates let you apply that content at scale. Within your connector's transforms, you can apply templates to add this content during the integration process.
Configuring comprehensive mode settings
When a connector runs in comprehensive mode, any records not present in the run are treated as removed from the data set. This can be used to remove providers who have left your organization or locations that are no longer open.
To configure comprehensive mode, navigate to Advanced Settings in your connector configuration (after the Mapping stage). From here, determine which entities can be affected by a run and what to do with entities not included — either update them or delete them.
Some healthcare systems use comprehensive mode to apply a label or indicator to providers not in the Kyruus feed, prompting a review within Yext rather than immediately deleting the entity. Comprehensive mode can also work with entity templates to apply logic for closing a location (e.g., setting hours to closed, appending "- Closed" to the location name).
See the Comprehensive Mode reference documentation for more details.