You can export entity data from the Knowledge Graph at any time. Exports can be performed on a one-off basis, or they can be saved and scheduled for automated delivery on a regular cadence.
You can use the Export Entities tool in the Knowledge Graph to select entities to export to a .csv or .xlsx file.
There are a few main components of an entity export:
- Data Format: this includes which entities to export, the language (you can override this in the export scheme step), the date from which you want to export data, and how to handle embedded fields.
- File Format: this includes the file type and the layout of the file
- Export Scheme: this includes which fields you want to export and how you want to format them.
Select Entities to Export
- Navigate to Knowledge Graph > Entities.
- Select the entities you would like to export.
- Use the checkboxes on the left side of the screen to select multiple entities, or to select all entities in the current view.
- You can also apply a saved filter and select all entities in the filter. To create a saved filter, see Create and Use Saved Filters.
- If you do not select any entities here, all entities in the Knowledge Graph will be included.
- Click on the More Actions button at the top of the Entities screen and select Export Entities.
Basic Info
On the Basic Info step of the Export Entities flow, review the Data and File format of your export. Click the Edit button next to any of the sections to make changes.
-
Entities to Export: This will confirm the number of entities in each type that you have chosen to export.
- You can uncheck entity types to remove all entities of that type from your export.
- To add entity types or make any other changes to specific entities included in the export, go back to the Knowledge Graph and re-select your entities.
-
Entity Language: By default, entity data will be exported in the primary language profile. If desired, select alternate language profiles to include in your export.
- Adding alternate language profiles will export data for all selected entities that have a profile in the selected language.
- Header Language: choose the language for the column headers in your exported spreadsheet.
-
Export Data as of: export data for your selected entities as of today, export past data, or export data updates scheduled for a future date.
- Today
- Past Date: choose a date up to 30 days in the past
- Future Date: export data will reflect updates scheduled up to your chosen date
- All Scheduled Updates: export data will reflect all future scheduled updates
-
Embedded Fields: choose how you want any embedded field data to display in your export.
- Export Field Values: export will contain the value of the embedded field (e.g., "Try the Out-of-This-World Deluxe Burger in New York City!")
- Export Embedded Field Label: export will contain the label of the embedded field (e.g., "Try the [restaurantPromotion] in [city]!"
- Export File Format: choose CSV or Excel (.xslx)
-
Export Layout: this is set to Horizontal by default (to display one entity per row in the spreadsheet). In most cases, you will not need to change this.
- If desired, select Vertical to display one entity per column.
-
Character Set: This is set to Unicode by default. In most cases, you will not need to change this.
- If desired, select ASCII.
When finished, click Continue.
Export Scheme
In the Export Scheme tab, you can modify which entity fields are included in the export, the order in which fields appear in the export, and the format of how data should be exported from certain fields. Select the fields you want to include in your export from the panel on the left.
Any selected fields will appear in the table to the right. Click the Actions dropdown on any field to reorder it in the table, remove it, or configure its formatting.
- To add or remove fields included in the export, select or deselect the checkboxes in the left panel.
- To remove a field, you can also click the Actions dropdown on a field in the table and select Remove.
- To re-order fields in your export, use one of these methods:
- Click and drag the three horizontal lines to the left of the field in the table.
- Click the Actions dropdown on a field in the table and select Bring to top or Bring to bottom.
- To configure the format of how data should be exported from a given field, click the Actions dropdown on the field in the table and select Configure. Different configuration options will display depending on the type of field:
- Text fields will allow you to specify a character limit, how the text should be cut off at that character limit, and whether to add an ellipsis (...) after the cutoff.
- Date and time fields will allow you to specify the date and time format (e.g., MM/DD/YYYY vs. DD/MM/YYYY or 1:30 PM vs. 13:30)
- List or struct-type fields will allow you to choose whether you want list items to display in their own columns in the export, or in the same column as a comma-separated list.
- Binary fields will allow you to choose whether you want to display values as Yes/No, True/False, or 1/0.
To generate an export in a specific publisher format (for example, if you want to upload a set of entities as locations to Google Business Profile), click the dropdown next to Export Scheme and choose your desired format:
- Google Business Profile
- Yelp
- Snapchat
- Bing Places
- Entity Upload (Yext)
When you're finished, click Continue. Your export will download automatically.
Save an Entity Export
If you want to re-use this export configuration, or if you want to set up automated delivery, enter a name for your export and click Save Export. Otherwise, click Done.
View and Edit Saved Entity Exports
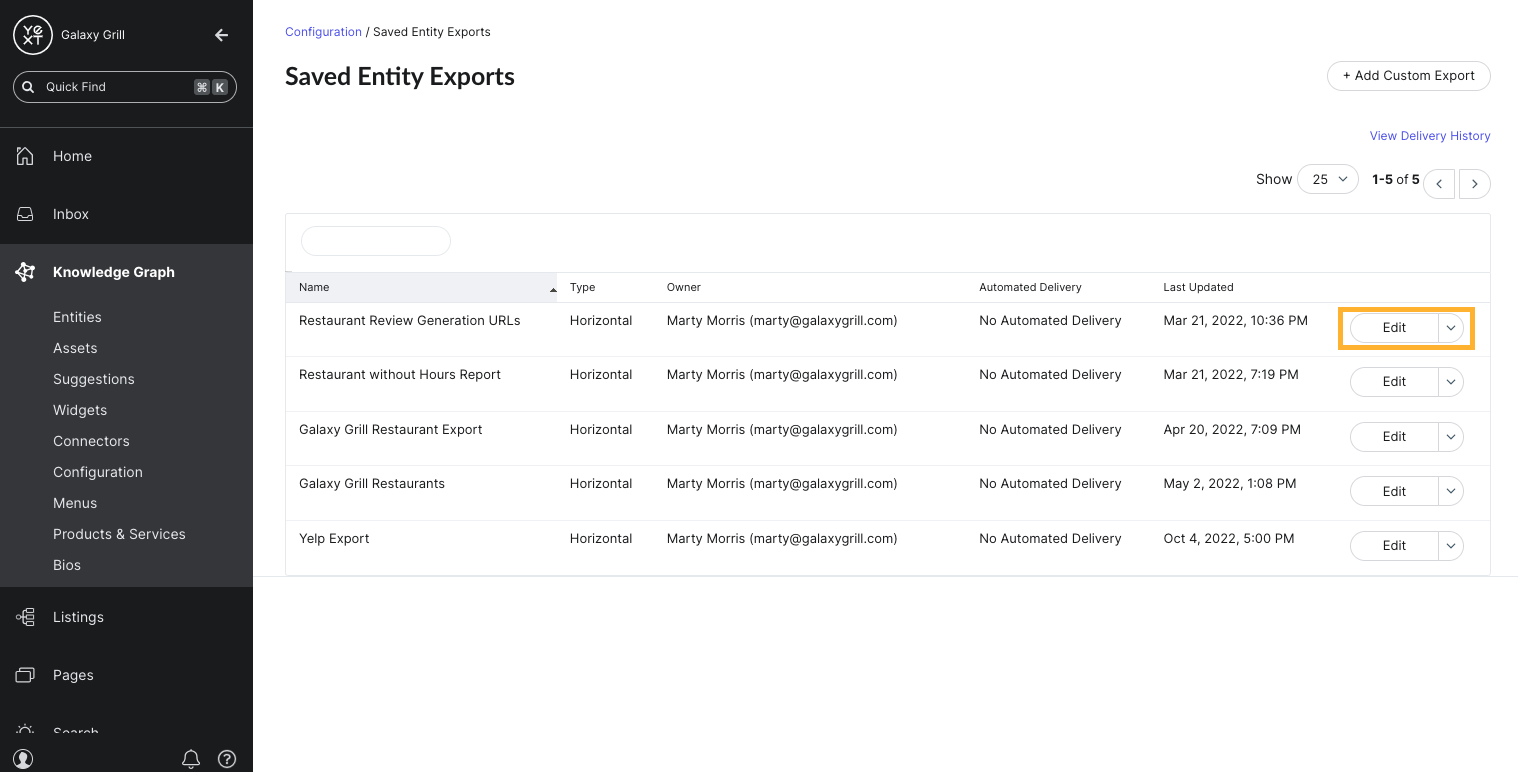
To see all your saved export configurations, navigate to Knowledge Graph > Configuration. Scroll to the Entity Management section and click the Saved Entity Exports tile.
Click the Edit button on the entity export configuration you want to make changes to. From here, you can set up automated delivery or make any other changes to the export configuration.
On this screen, you can edit the same settings that were shown when you initially created the export.
Apply Entity Filter Criteria to Saved Entity Exports
To change the criteria that dictate which entities should be included in a saved entity export, you will need to recreate the filter criteria in the Knowledge Graph and reapply it to the saved entity export.
- Navigate to Knowledge Graph > Entities.
- Click on the default filter options in the top filter bar, or click Add Filter to view additional options.
- Select your desired filter criteria. Make sure to include all the criteria that you want to be applied to your saved entity export.
- Click Apply Filter.
- Click on the More Actions dropdown at the top of the Entities table and select Apply Search to Saved Export.
- In the modal that appears, select your desired saved entity export from the dropdown.
-
Click Apply Active Filter to Saved Export.
Set Up Automated Delivery on a Saved Entity Export
You can set up automated delivery on a saved export in two ways:
- FTP/SFTP (File Transfer Protocol or Secure File Transfer Protocol)
To set up automated delivery of entity exports:
- Navigate to Knowledge Graph > Configuration. Scroll to the Entity Management section and click the Saved Entity Exports tile.
- Click the Edit button on the entity export configuration you want to automate.
- To create a new entity export configuration, click the Add Custom Export button in the upper right.
- On the Manage Saved Entity Export screen, click Edit on the Automated Delivery section.
- In the Type dropdown, choose how you want your entity export to be delivered: Email, or file transfer via FTP or SFTP.
Follow the steps below depending on your chosen delivery type.
Set up delivery via email
- In the Email Address field, enter the address(es) of your chosen recipients, separated by commas.
- Click Send to me to include your own email address (this will populate the email address under which you are currently logged into Yext).
- In the Subject Line field, you can enter a subject line for the automatic delivery email.
- Set the Frequency options depending on how often you want the export to be sent to your recipients:
- Choose from Hourly, Daily, Weekly, Biweekly, or Monthly.
- Select a start date, time, and time zone for the first delivery. Note that relative time zones are not an option, and all your recipients will receive the export at the same time, regardless of their location or time zone.
-
Ignore Empty File: choose how the export delivery should respond if there is no available data matching your export filters for your chosen time interval (for example, if you chose Weekly delivery, and this week's export does not contain any entities based on the filters in your saved export configuration).
- Yes: empty files are ignored, and the export delivery is skipped for that time interval
- No: empty files are not ignored, and the export delivery will be sent on schedule, containing a blank file.
- Click Save.
When your recipients receive the automated email, it will contain a link to download the file containing the export data, as in the example below. Download links are valid for seven days after they are sent.
After setting your email delivery preferences, you can send a test version of your export email. To do this, click the Send Test button on the Automated Delivery section of your saved entity export settings.
Set up delivery via FTP/SFTP
Reach out to your systems administrator or IT team in order to enter the correct host, username, password, and folder path for your organization.
- Host: enter the FTP or SFTP host address for your server. Do not include the protocol ("ftp://" or "sftp://").
- Port: the default port is 21 for FTP, and 22 for SFTP.
- Enter the username and password.
- Enter the folder path where you would like the file transfer to be delivered.
- Click the Delivery Option dropdown to choose how you would like your file transfer to be handled:
- Rename File Upon Transfer Completion: The file will be sent as a ".tmp" temporary file. Once the transfer is complete, the file will be automatically renamed to remove the temporary file extension.
- Send 'Done' File Upon Transfer Completion: Once the transfer is complete, Yext sends a file with a ".done" extension (e.g., "filename.csv.done").
- Transfer the File: Yext transfers the file with no extra indication that the transfer has been completed. Choosing this option may result in issues if a user attempts to open or read the file before the transfer is complete.
- Set the Frequency options depending on how often you want the export to be sent to your recipients:
- Choose from Hourly, Daily, Weekly, Biweekly, or Monthly.
- Select a start date, time, and time zone for the first delivery. Note that relative time zones are not an option, and all your recipients will receive the export at the same time, regardless of their location or time zone.
-
Ignore Empty File: choose how the export delivery should respond if there is no available data matching your export filters for your chosen time interval (for example, if you chose Weekly delivery, and this week's export does not contain any entities based on the filters in your saved export configuration).
- Yes: empty files are ignored, and the export delivery is skipped for that time interval
- No: empty files are not ignored, and the export delivery will be sent on schedule, containing a blank file.
- Click Save.
The files containing your entity export data will be named as follows: (Export Configuration Name)-(Date YYYY-MM-DD)-(Timestamp in milliseconds)
For example, the file name for a saved export called "Restaurant Review Generation URLs", exported to a CSV format on April 7th, 2025 at 10:52am (Eastern - New York time) would look like: "restaurant-review-generation-urls-20250407-1744037536284.csv".
View Delivery History for Saved Exports
After setting up automated delivery, you can view the delivery history for a record of all deliveries of your saved exports, and the status of each delivery.
From the Saved Entity Exports screen, click View Delivery History in the upper right.
Here, you'll see a table of all automated entity export deliveries, including the Type (Email, FTP, or SFTP), the Status, and the Export Date.
Click the All Saved Exports dropdown to filter to deliveries for a specific saved export.