Many businesses use service areas staffed by remote agents to deliver services to customers. In the Knowledge Graph, you can customize entity types to display remote agents that serve a designated service area, without specifying a physical location. These service area-only entities can be geocoded just like physical addresses, and displayed with pins on a map visible on listings and search results across the Publisher Network.
In this documentation you will:
- Create a custom entity type for service area-only locations or agents
- Define service areas for your entities
- Learn next steps for including your new entity type in Listings and Search
Step 1: Create a Service Area-Only Entity Type
To configure entities with service areas but no physical address, you need to create an entity type that includes the built-in Service Area Places field and does not include the built-in Address field.
You can do this directly in the Knowledge Graph, or by copying and modifying an existing entity type via the Admin Console.
Option A: Create an Entity Type in the Knowledge Graph
- Navigate to Knowledge Graph > Configuration and select the Entity Types tile.
- Click Add Custom Entity Type in the upper right. Enter a name (e.g., "Virtual Agent"), a plural version if desired, and an optional description.
- In the field schema, include the Service Area Places field. Do not include the Address field. Configure any other fields and field sections you want on the entity type.
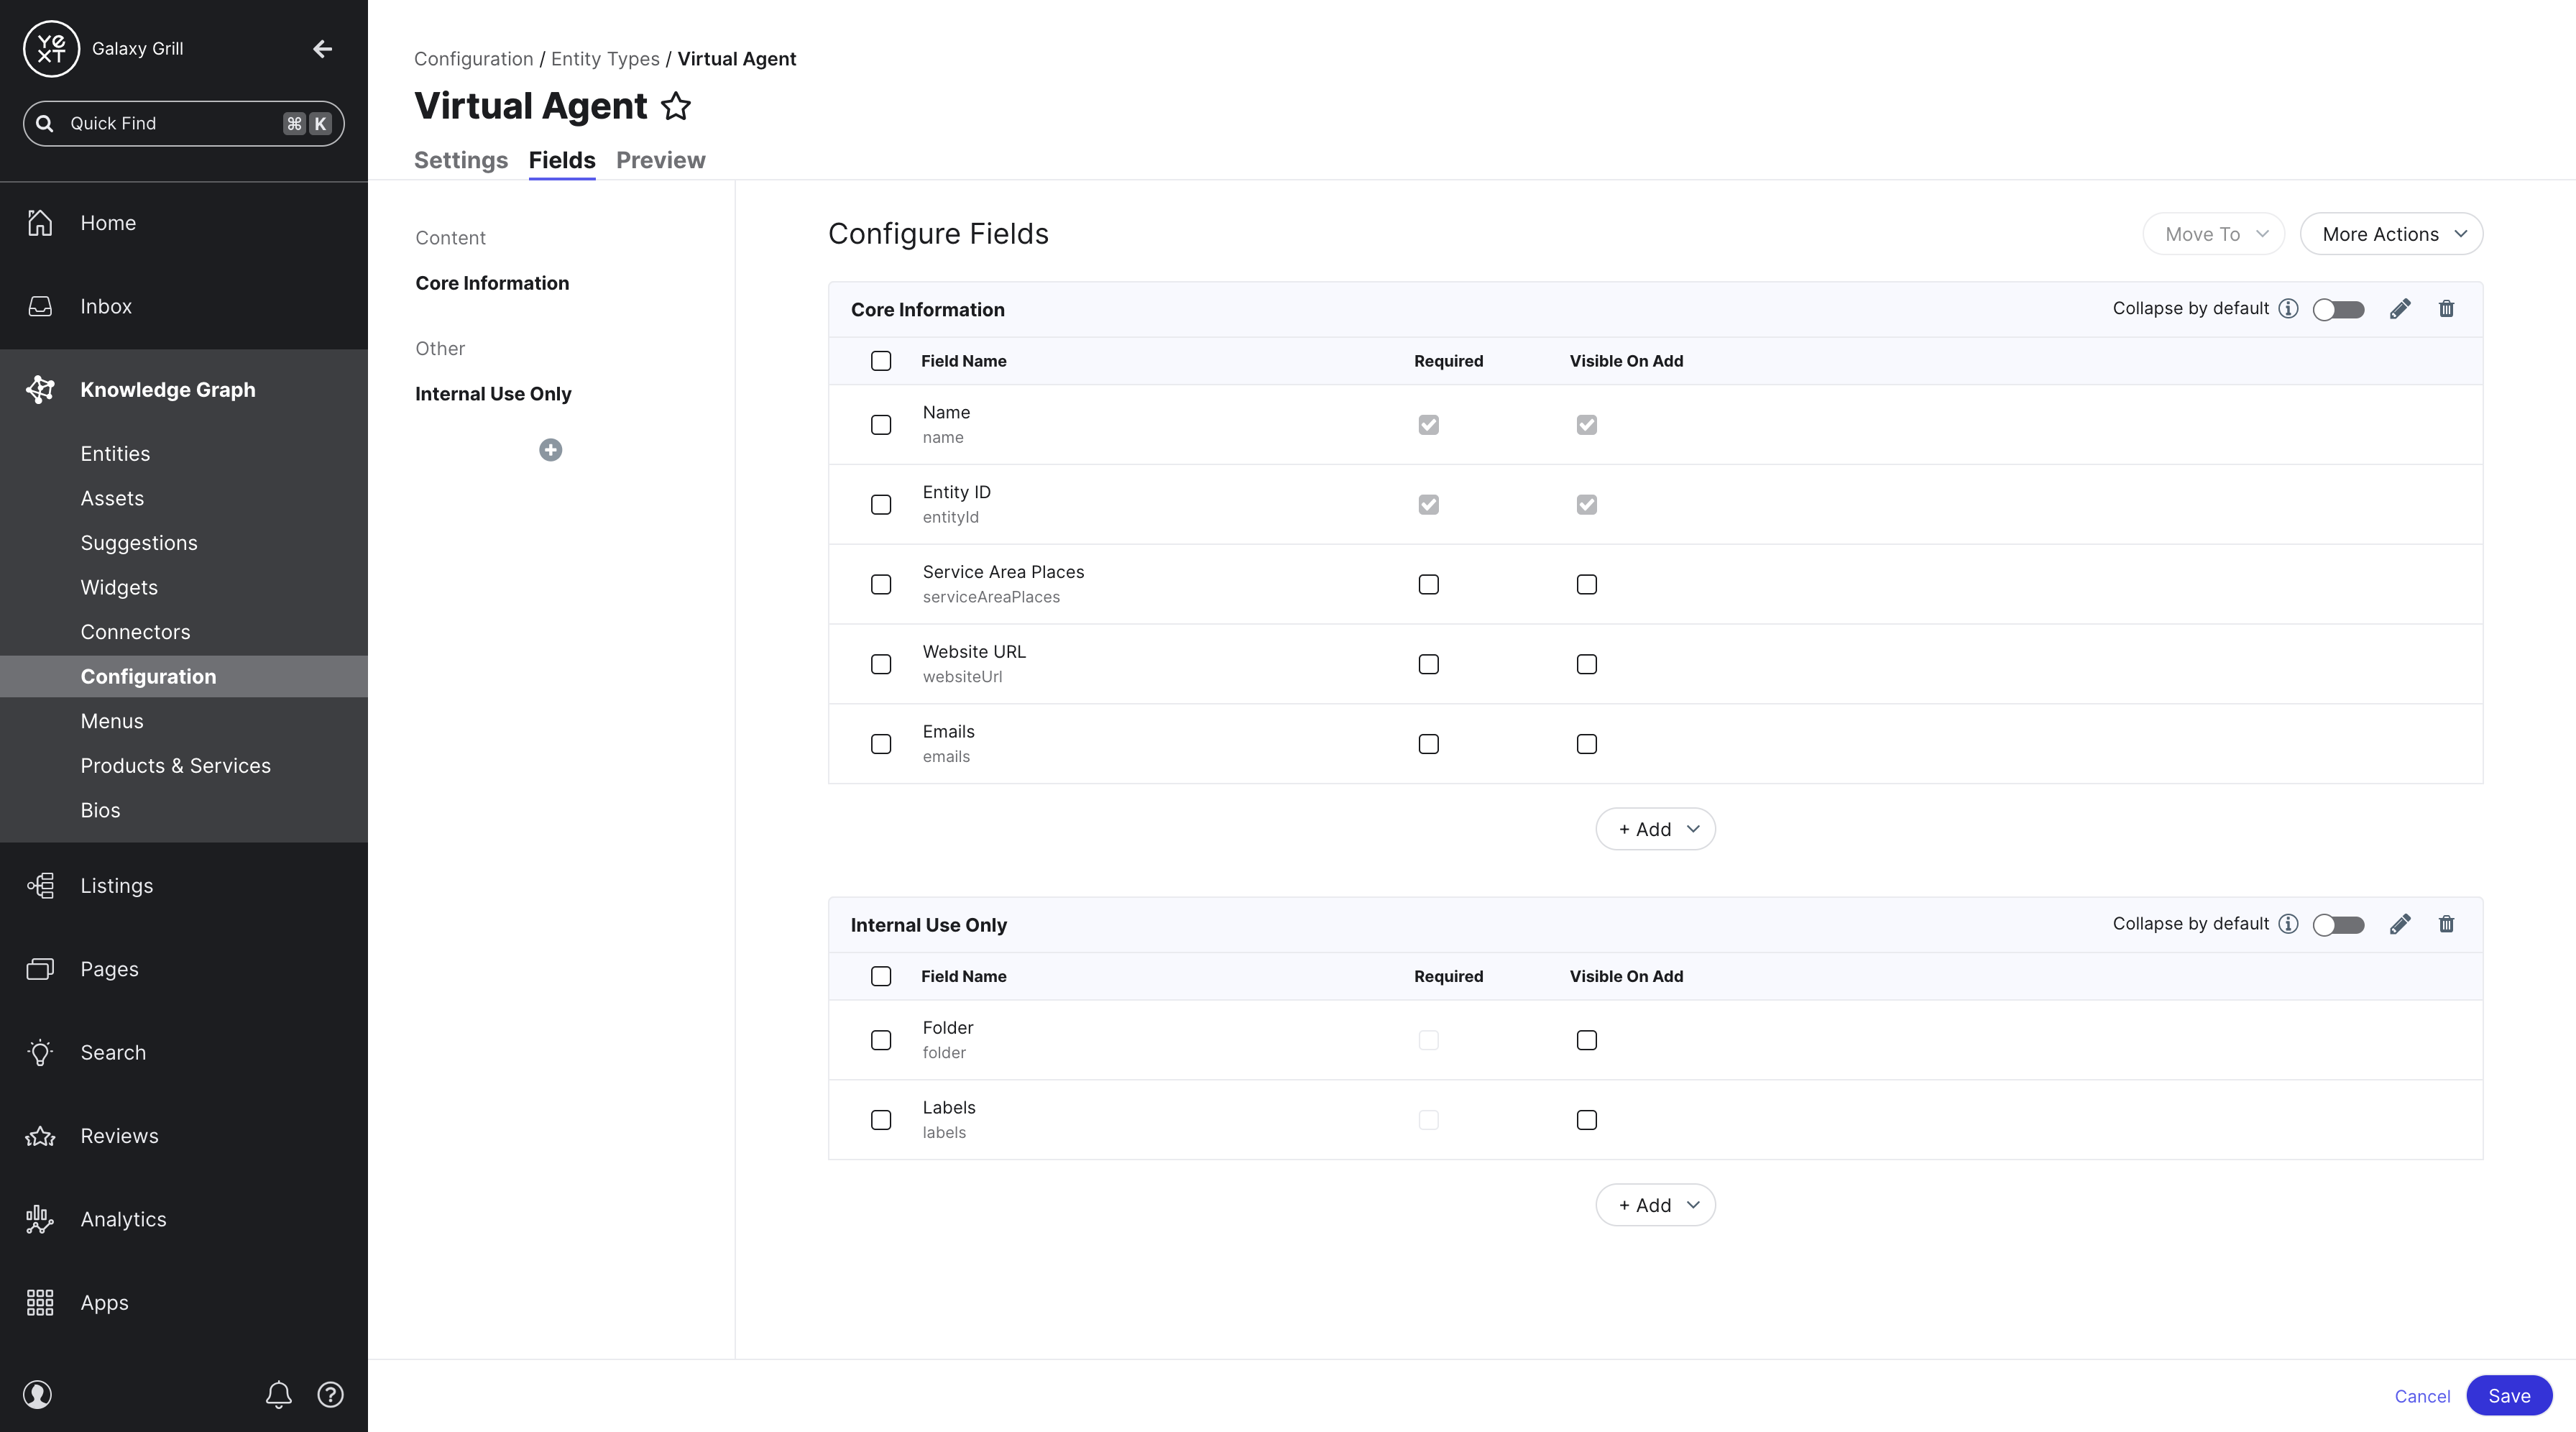
- Click Save in the lower right.
Option B: Copy and Modify an Entity Type via the Admin Console
- Navigate to Developer > Admin Console.
- Add a new resource in each of the following three folders:
ce/km/entity-type.jsonce/km/field-presentation.jsonce/km/field-eligibility-group.json
- Click the plus icon in each folder to add a new resource. Use a consistent naming convention based on your new entity type's internal ID. For example, for a "Virtual Agent" entity type:
ce/km/entity-type/virtualAgent.jsonce/km/field-presentation/virtualAgent.jsonce/km/field-eligibility-group/virtualAgent.default.json
- Open the
entity-typeresource for the entity type you want to duplicate. Copy its entire contents into your newentity-typeresource. Edit the following fields:-
"$id"— e.g.,"ce_virtualAgent" -
"description"— enter a description or leave blank -
"displayName"— the name as it appears in the Knowledge Graph (e.g.,"Virtual Agent") -
"pluralDisplayName"— optional plural form (e.g.,"Virtual Agents")
-
-
Repeat Step 4 for the
field-presentationresource. After pasting the copied content, make these changes:Remove the
addressandaddressHiddenfields from thepresentationEntriesarray:{ "id": "address", "visibleOnAdd": true }, { "id": "addressHidden" },Add the
serviceAreaPlacesfield (includingvisibleOnAddis optional):{ "id": "serviceAreaPlaces", "visibleOnAdd": true }, -
Repeat Step 4 for the
field-eligibilityresource. If copying from a built-in entity type, find the content indefault/km/field-eligibility-group. After pasting, make these changes:- Replace
entityTypeNameandEntity Typewith your new entity type's internal ID and display name. - Include
serviceAreaPlacesin thefieldsarray:
{ "$id": "ce_entityTypeName.default", "name": "Entity Type Name-default", "entityType": "ce_entityTypeName", "fields": [ "serviceAreaPlaces" ] } - Replace
-
Click Apply in the upper right of the Admin Console, then Continue in the modal.
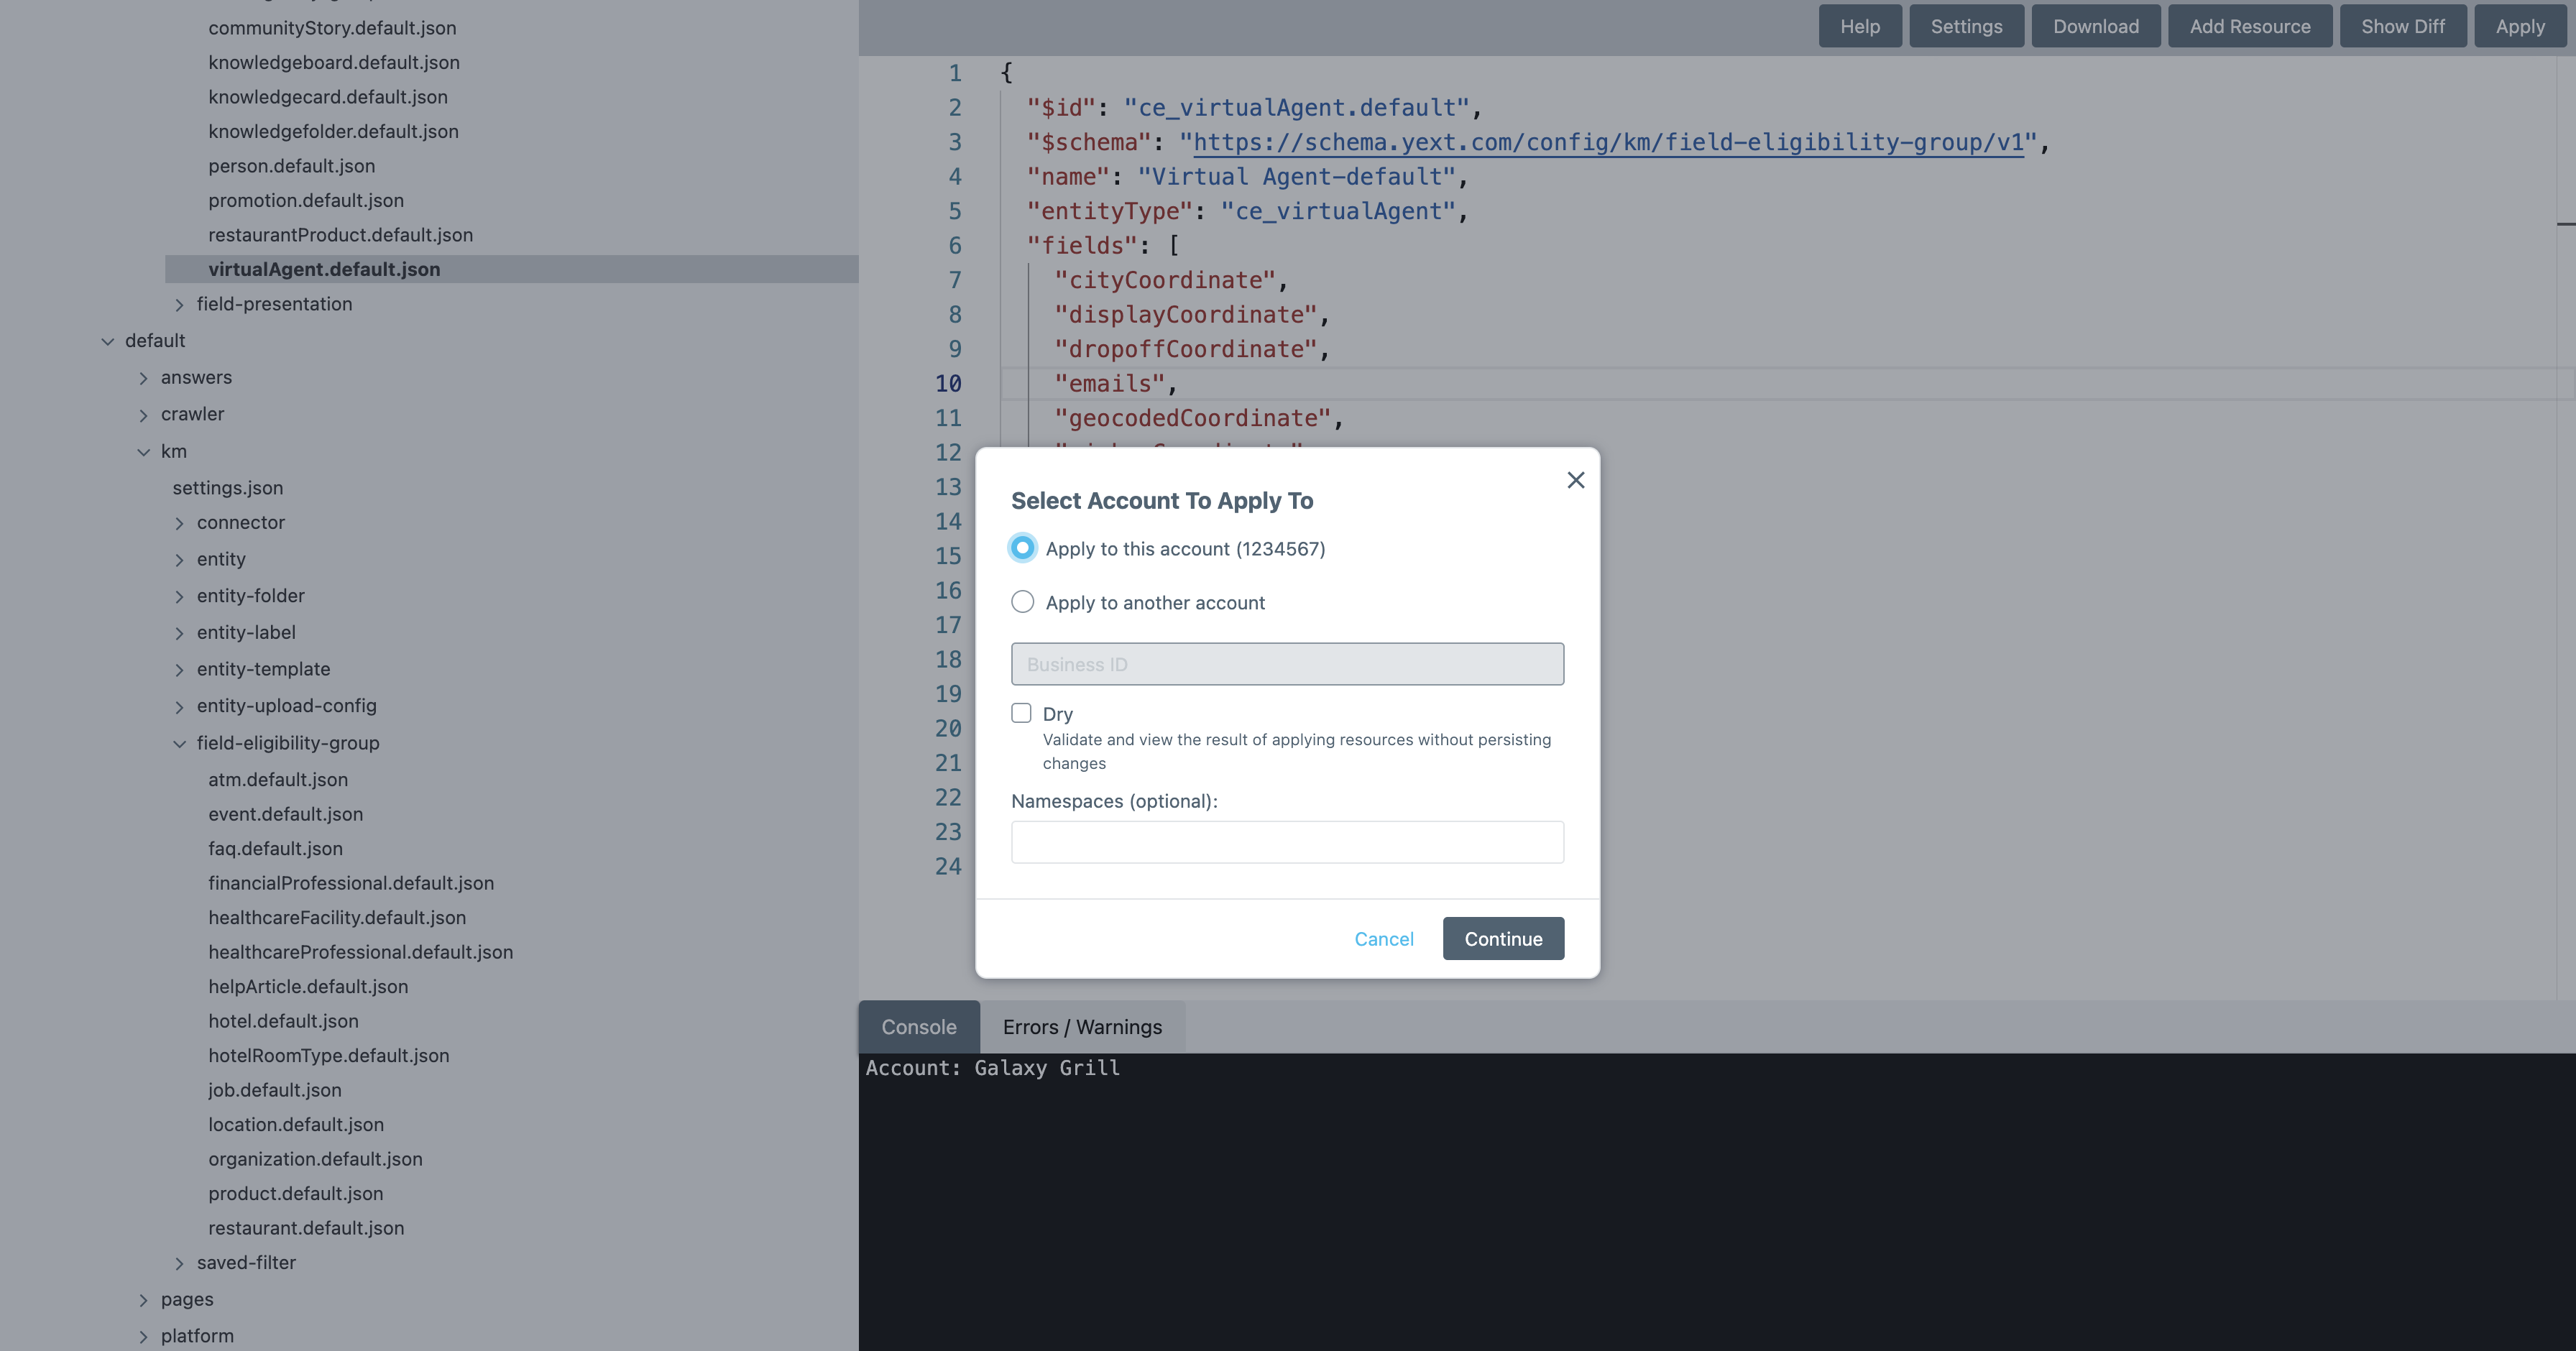
- When the Variables modal appears, click Save to skip entering values.
- Review the View Diff modal, then click Continue.
- Click Confirm in the final confirmation modal.
Step 2: Add Service Areas to Entities
After creating your new entity type, create entities using it and set their service area information. You can create entities via any method you typically use: individually in the Knowledge Graph, using the File Upload tool, or using Connectors.
Add Service Areas in the Knowledge Graph
The Service Area Places field appears with the Address field label in Entity Edit.
- Click to edit the Address field. You will see options to add service areas.
-
Choose a type from the dropdown (Postal Code, City, County, State/Region, Sublocality, or Other), then enter the information for that type.
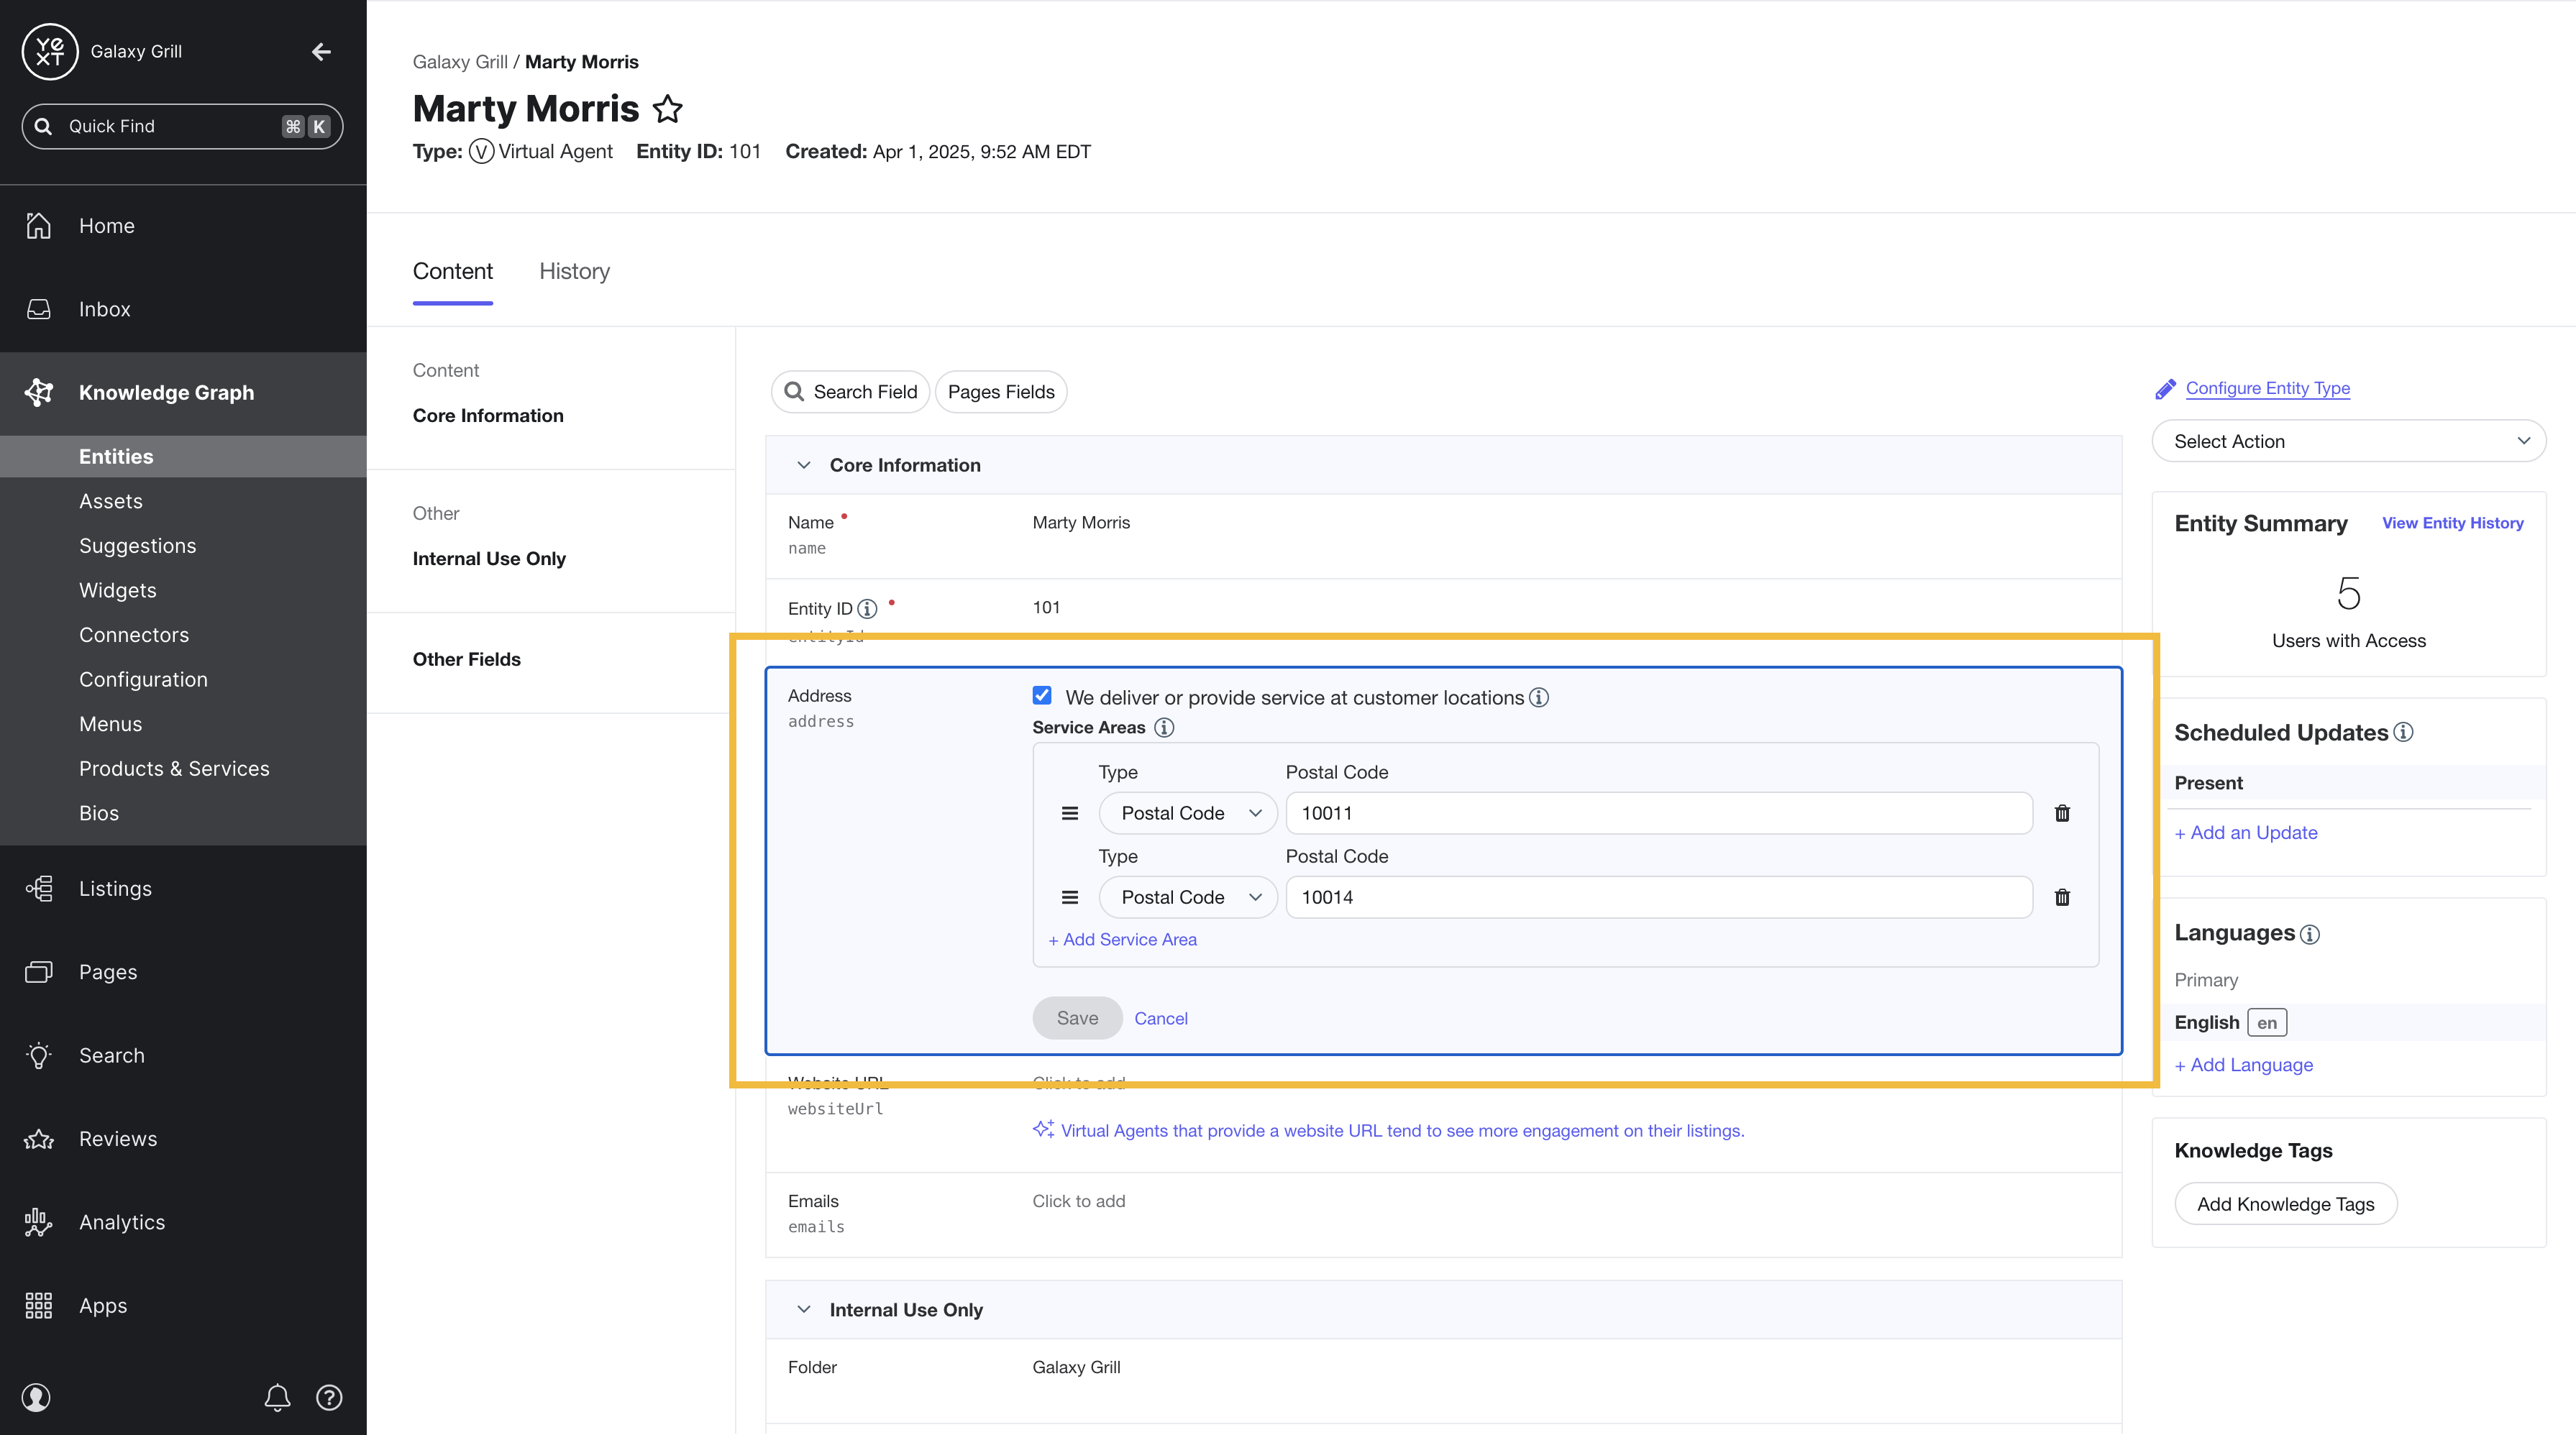
- Click Add Service Area to add additional service areas. When finished, click Save.
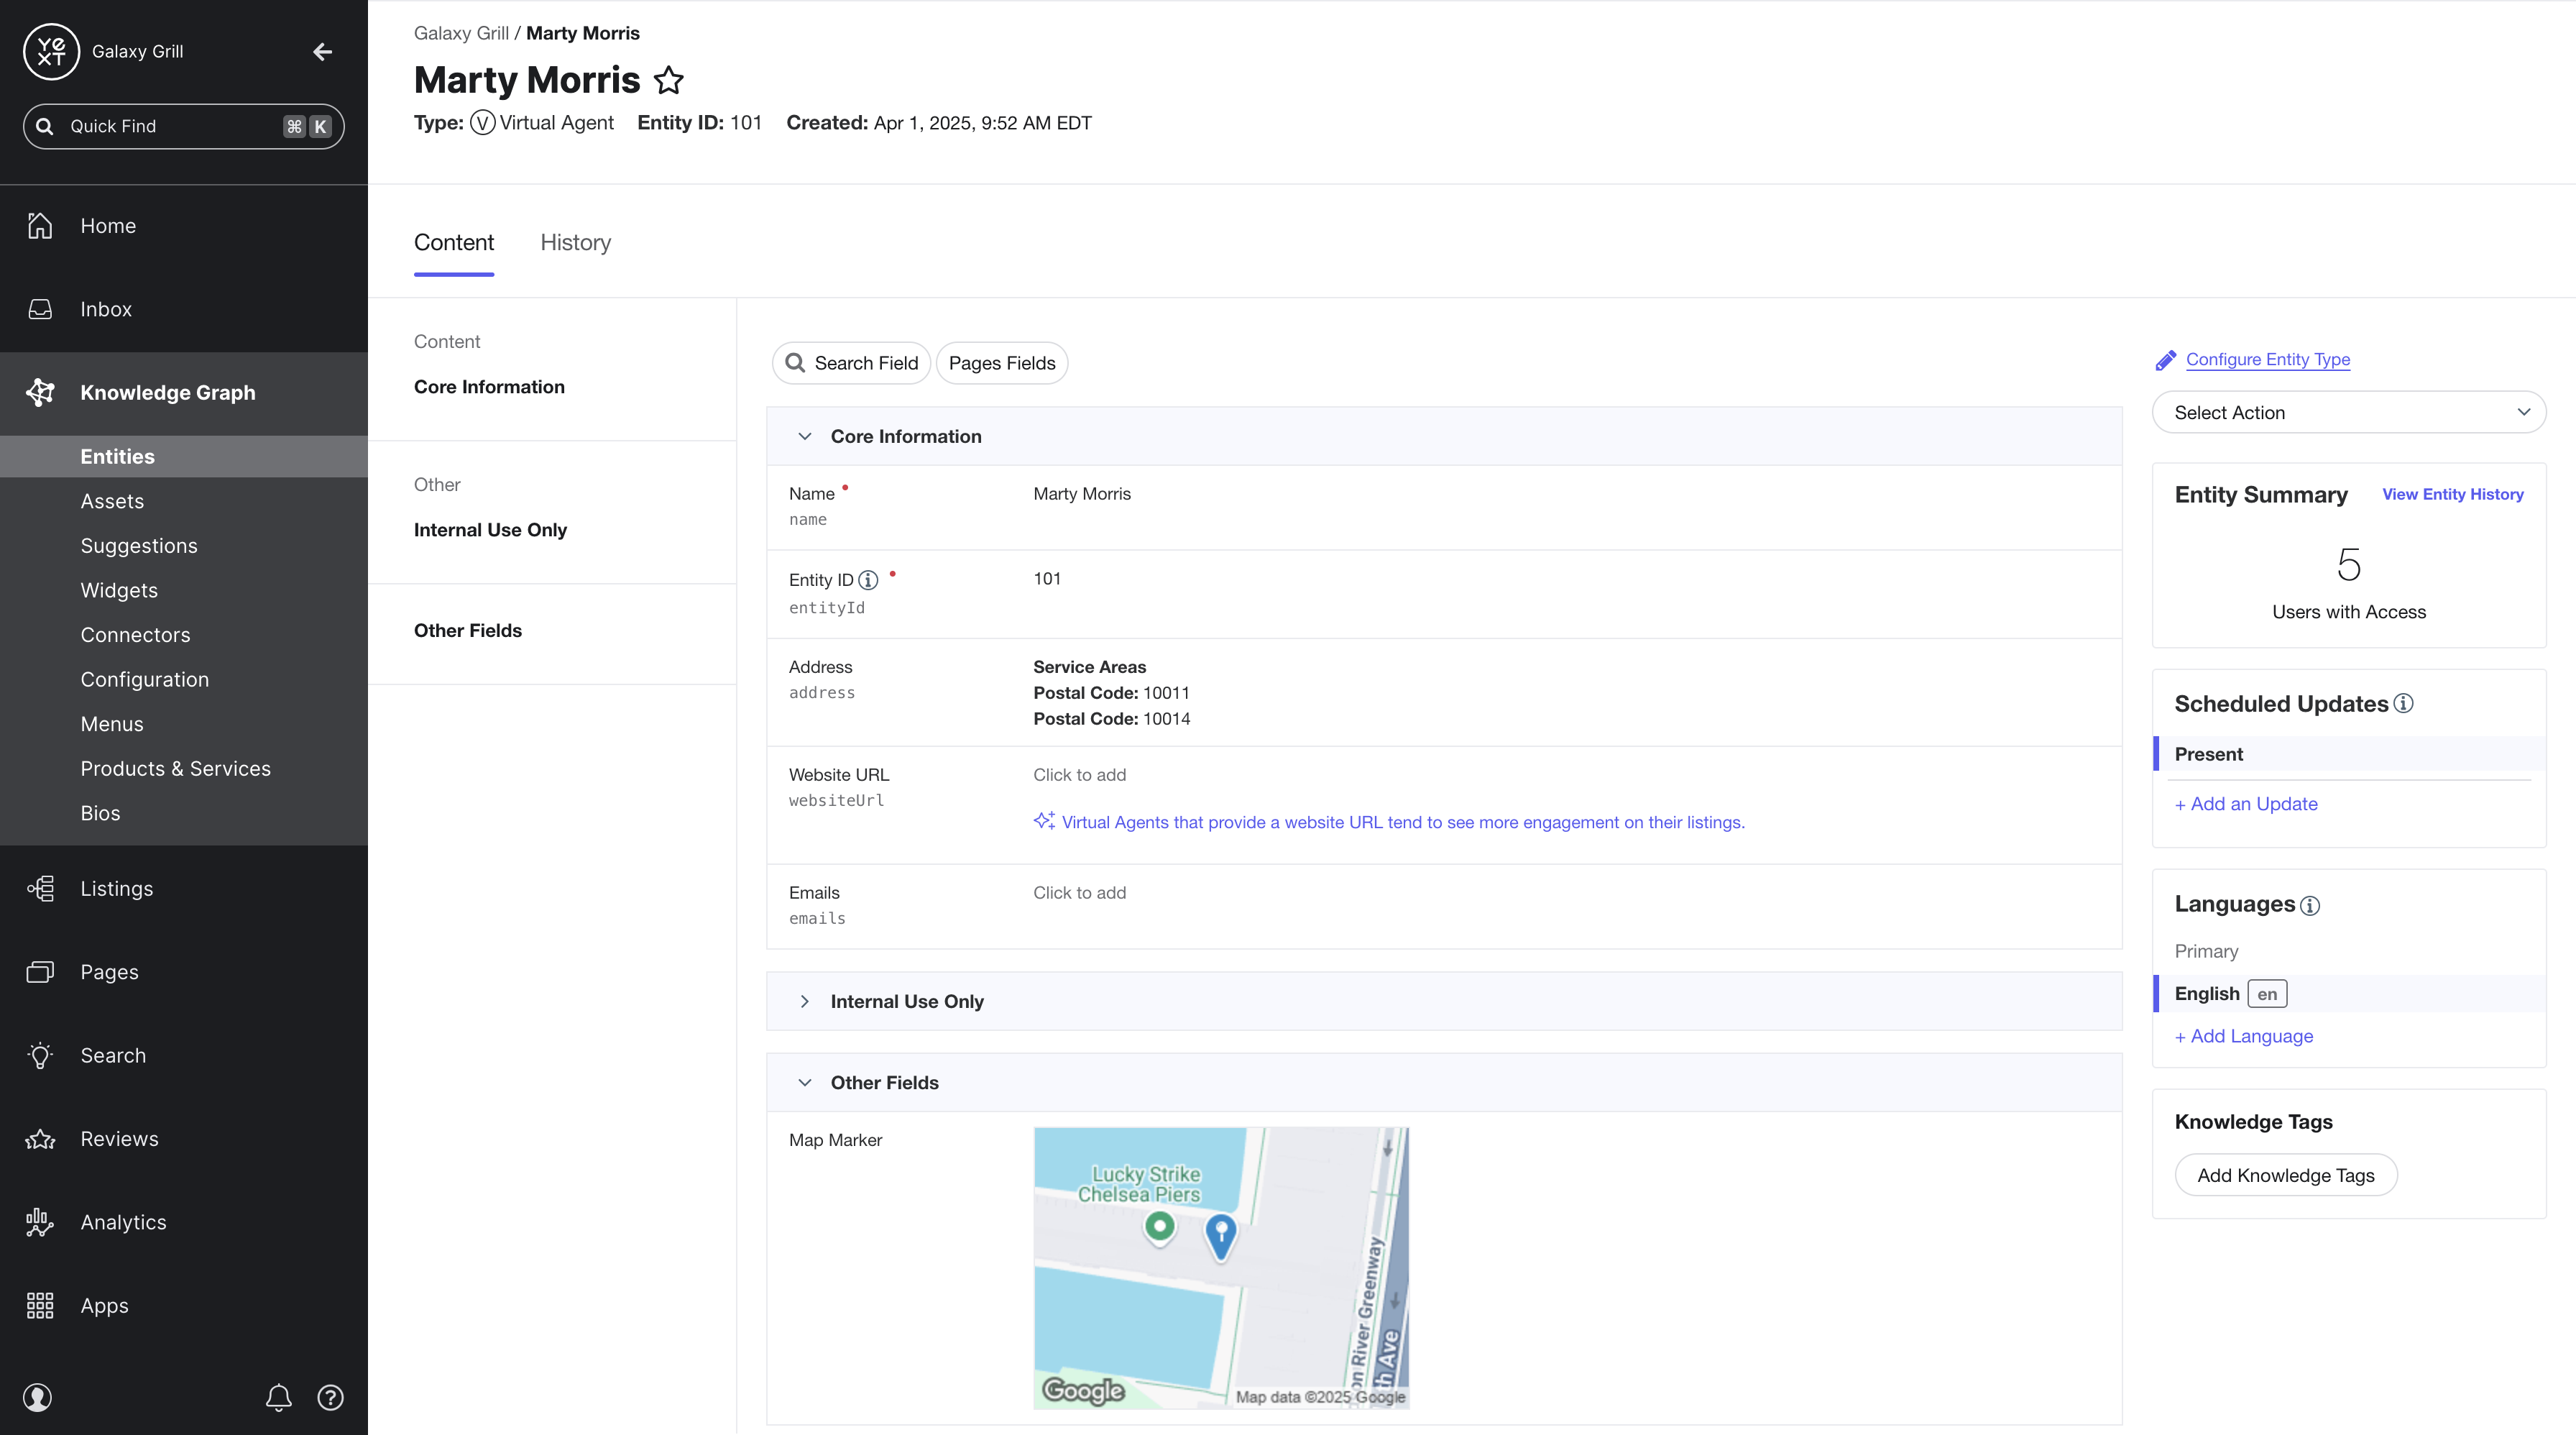
-
Refresh your entity and scroll to the Map Marker field to see the generated map pin that will appear on listings and search results. If the entity has multiple service areas, the pin reflects the first service area added.
For full steps, see the Add a Service Area to an Entity " documentation.
Add Service Areas via File Upload or Connectors
Format the Service Area Places field using two columns:
-
Service Area Places > Type:
Postal Code,City,County,State/Region,Sublocality, orOther(or leave blank for Other) - Service Area Places > Name: The content of each service area (e.g., the zip code, city name, etc.)
For entities with multiple service areas, separate values in each column with commas:
| Entity ID | Service Area Places > Type | Service Area Places > Name |
|---|---|---|
| 101 | City,Postal Code,Other | New York,10011,Lower Manhattan |
| 102 | City,Postal Code | Chicago,60601 |
Next Steps
Once your entities are created and their service areas are defined, use them in Listings and Search:
- Configure your Search experience backend to include your new entity type in an existing or new vertical
- Configure your Search experience frontend to include your new entity type
- Launch your new entities on Listings